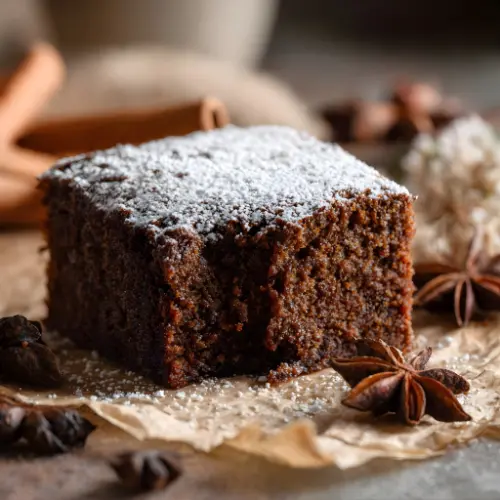
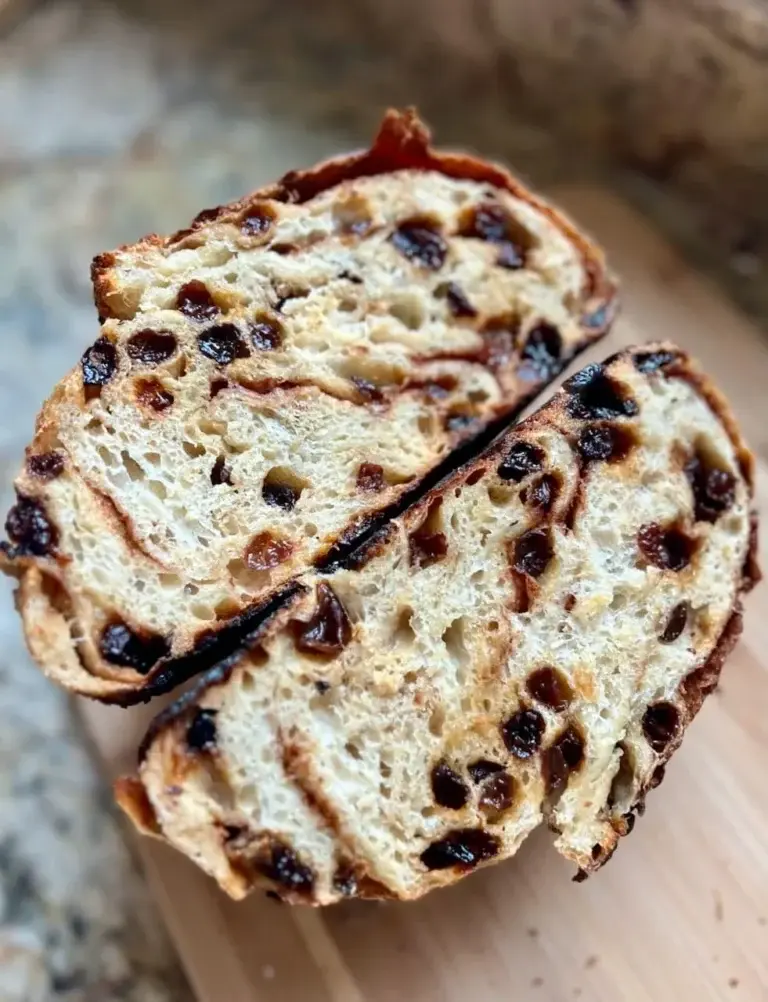
Cinnamon Raisin Sourdough Bread Recipe (Easy & Homemade)
Store-bought cinnamon raisin bread rarely delivers it’s too sweet, too soft, and full of preservatives. That changes today. This homemade Cinnamon Raisin Sourdough recipe gives you a naturally fermented, deeply flavorful loaf with a chewy crumb, golden crust, and the perfect balance of warm spice and fruit. No artificial additives. No disappointment. Just real bread, made by you. In this article, you’ll find a foolproof, step-by-step guide to baking the best cinnamon raisin sourdough right in your own kitchen.
Ingredients & Substitutions
* To find precise measurements, scroll to the bottom of this post to find the recipe card*
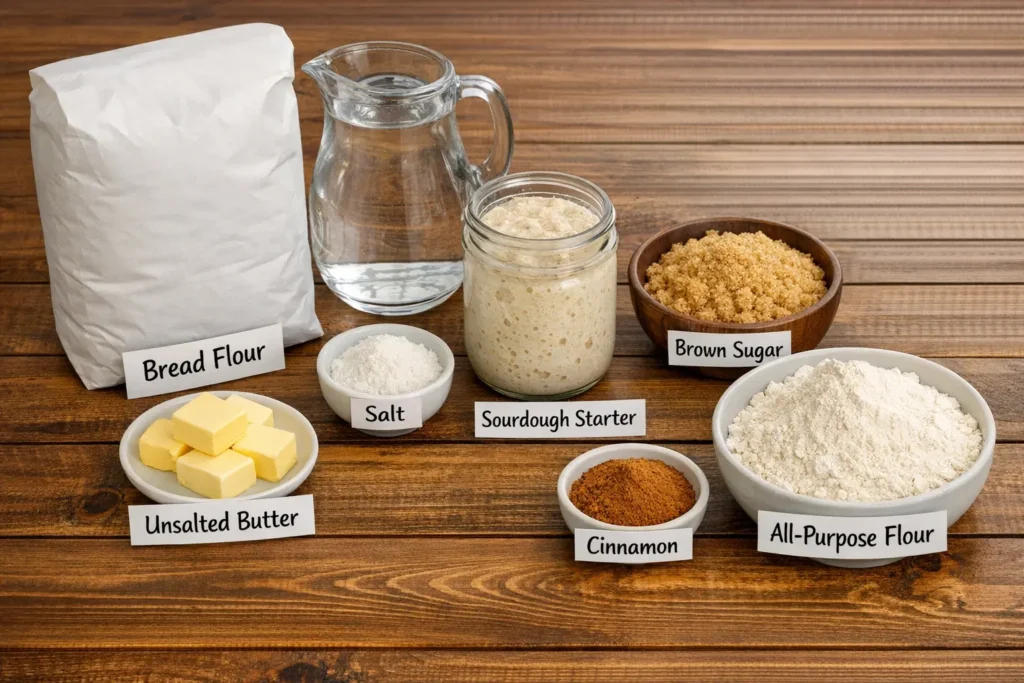
- Bread flour: Bread flour is best when it comes to making sourdough bread. The higher protein percentage in flour gives the dough its strength so that it can rise to great heights and give you the best results. However, you can use all-purpose flour as a 1:1 substitute.
- Water: Use room temperature, filtered water for consistent results.
- Sourdough starter: This recipe calls for an active and bubbly sourdough starter.
- Salt: Any unrefined salt will do, but my favorite is Redmond’s unrefined salt for some extra minerals!
Filling
- Unsalted butter: For the easiest mixing and spreading, be sure to use softened, room-temperature butter.
- Brown Sugar: Brings a touch of caramel-like sweetness to the bread.
- All-purpose flour: Sugar draws out moisture from your dough. Adding all-purpose flour to the cinnamon sugar filling helps to prevent a lot of leakage during your second rise/cold-proof.
- Cinnamon: If you prefer a sugar-free loaf, skip the cinnamon sugar filling and instead sprinkle ground cinnamon on the dough using the lamination technique during shaping.
Supplies
- Large bowl
- Kitchen Scale
- Bowl scraper (optional)
- Banneton Basket (proofing bowl) or small mixing bowl and tea towel
- Danish Dough Whisk
- Dutch Oven
- Parchment Paper
- Lame / Razor blade / Sharp knife
- Tea towel, plastic wrap, or what I like to use, a reusable shower cap
Baker’s schedule #1
DAY 1
Feed starter before bed in a 1:4:4 ratio (ex. 10g starter /40g flour /40g water)
DAY 2
9 am: Mix Ingredients
9:30 – 11:30 am: Stretch and fold every 30 minutes
9 pm: Preshape
9:30 pm: Inclusions, shape and place in the fridge
DAY 3
Score and bake in the morning
This schedule is made for a 68-70 degree environment. Higher temperatures will quicken the process. Lower temperatures will lengthen the process.
Baker’s schedule # 2
DAY 1
Feed starter so that it’s active, bubbly, and at its peak (4-12 hours before mixing dough)
8 pm – Mix Ingredients
8:30 – 10:00 pm – Stretch and fold every 30 minutes
DAY 2
8 am – Preshape
8:30 am – Inclusions, shape and place in the fridge
Score and bake in the evening

This schedule is made for a 68-70 degree environment. Higher temperatures will quicken the process. Lower temperatures will lengthen the process.
How to Make Sourdough Cinnamon Raisin Bread Recipe
Make the dough
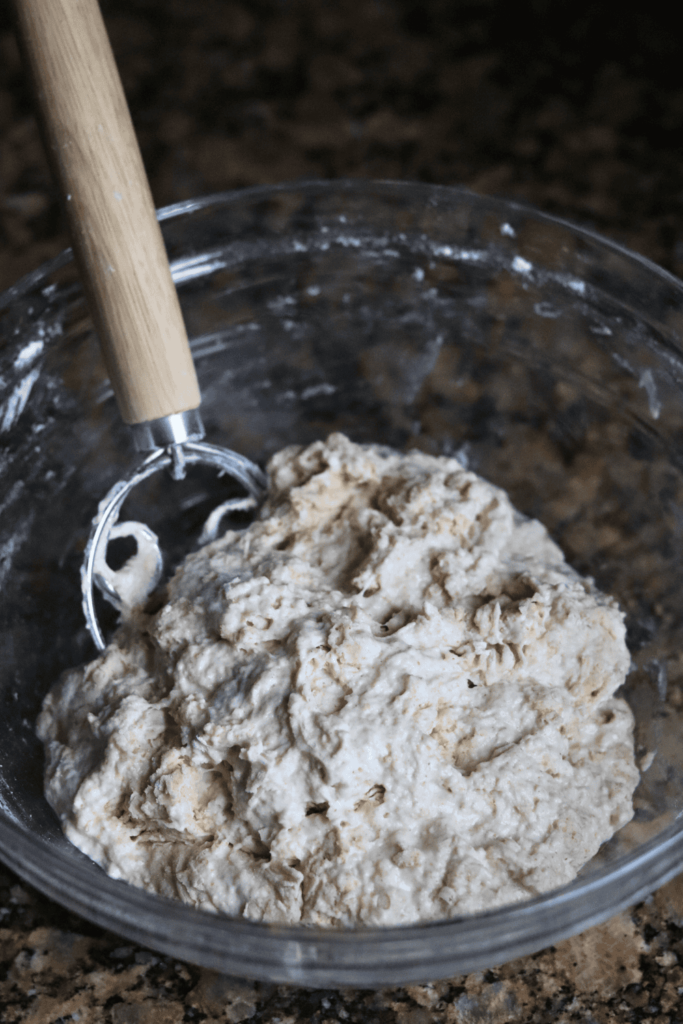
In a large mixing bowl, add the active sourdough starter and room-temperature filtered water. Mix with a Danish dough whisk or with your hand until it looks like a milky liquid.
Then, add the bread flour, whole wheat flour and salt. Again, mix with a whisk or by hand. Be sure to mix until all of the flour is incorporated. The dough will look shaggy, not like a uniform dough ball. This is also a higher hydration dough, so the dough will seem sticker and eventually more elastic than compared to my Beginner’s Sourdough Loaf recipe. This is due to the higher amount of water in the dough and totally normal.
Flour
I love the depth of flavor that whole wheat flour brings to this sourdough bread, however, you can skip the whole wheat flour and substitute it for more bread flour. If you do, I would reduce the water from 400g to 350g, as well.
Cover the bowl with a reusable shower cap and let the dough rest for at least a half hour before you move on to the next step.
Inclusions
While the dough rests, prepare your raisins. You can add dried raisins as they are, but I prefer plumping them up beforehand.
To do so, add the raisins to a bowl and cover them with boiling water for at least 30 minutes. Once plump, drain the raisins and thoroughly pat them dry.
For even more flavor, try adding vanilla extract to the boiling water while your raisins soak!
Stretch and folds
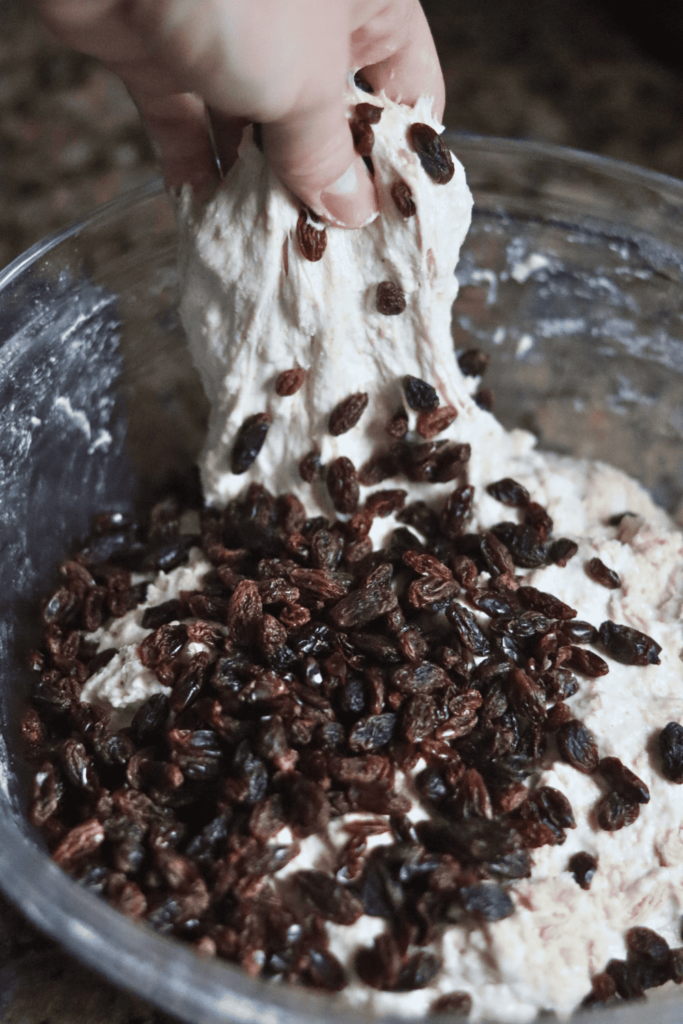
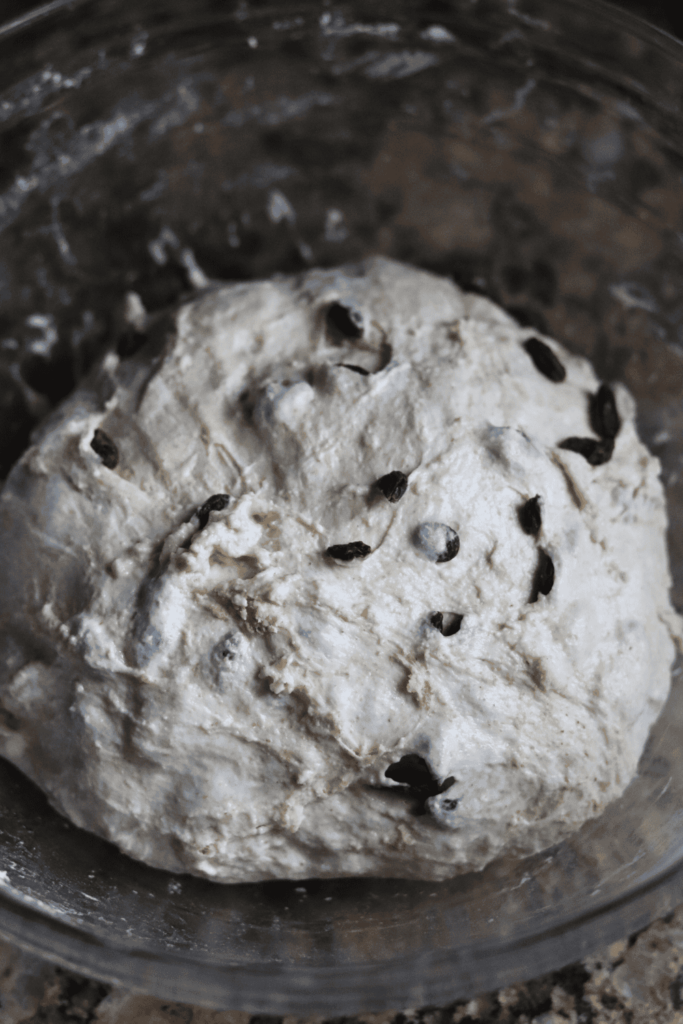
After thirty minutes, remove the cover. With a bowl scraper, scrape the dough away from the bowl. Then pour the raisins on top.
Now, with slightly wet hands, reach down to the bottom of the bowl, grab a section of the dough and stretch the bread dough above itself. Then fold it over on top of the dough. Remember, the dough will feel stickier and more elastic, this is to be expected.
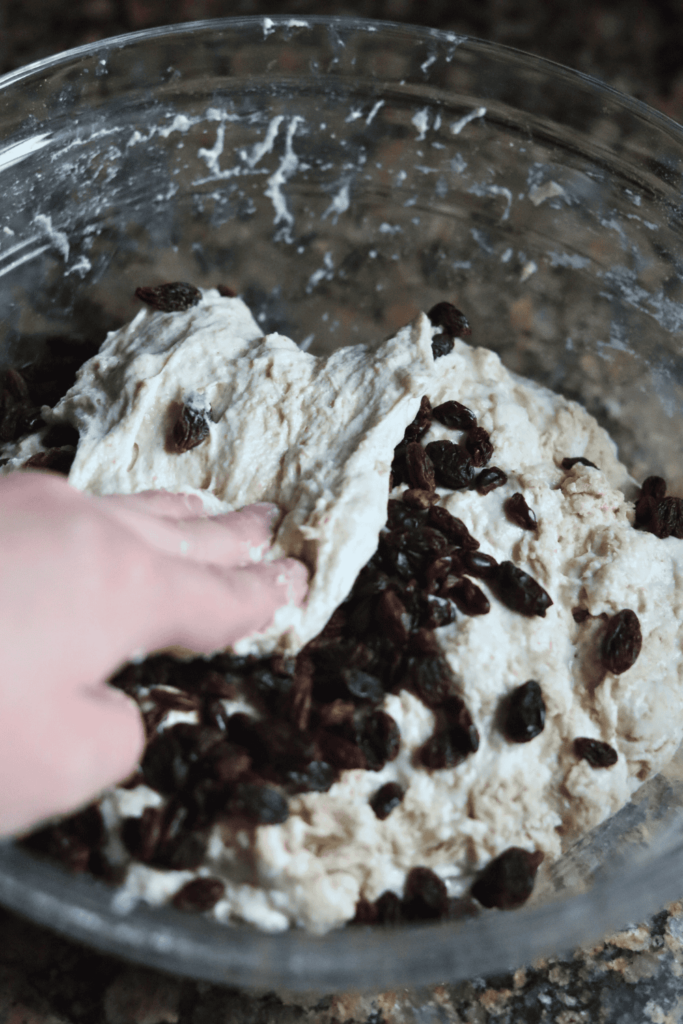
Rotate your bowl clockwise a quarter of the way and repeat identical stretch and fold. Repeat the process until you come full circle. You will notice the dough will start to look much smoother than before.
As you continue to stretch and fold the dough, the raisins will continue to be evenly mixed.
Cover and let the dough rest for another 30 minutes.
Repeat the same stretch and folds 3 more times, for a total of 4 sets. Cover the dough and wait for at least 30 minutes of rest in between each set.
Once you have completed the final set of stretch and folds, cover the dough and let it rest for the remainder of the bulk fermentation, about 9-11 more hours if the dough is kept at 68-70 degrees F.
Bulk fermentation
Now this is the most finicky part of sourdough. There isn’t a set time for your bulk ferment. It is greatly dependent on the temperature of your environment. The warmer it is, the faster your dough will ferment. The opposite is true for cooler temperatures.
In an environment of 68-70 degrees F, doughs will typically bulk ferment for 9-11 hours more after the stretch and folds, but again, you will have to look for the signs that your dough is done fermenting, rather than the clock. Warmer temperatures will be faster, while cooler temperatures will be slower.
Here’s what to look for:
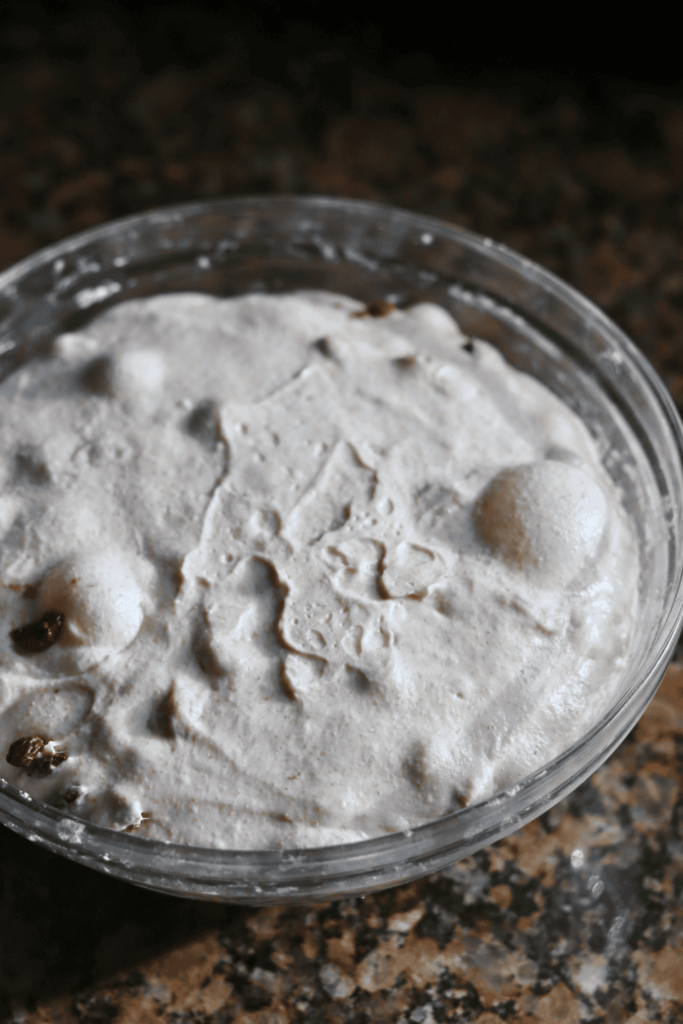
- The dough should have increased in size by at least 75% and be domed on top.
- The dough looks light, and jiggles when the bowl is shaken.
- The dough should easily pull away from the bowl.
- There should be visible bubbles in the dough and on top.
- The dough doesn’t tear when you do a windowpane test
Pre-shape
With slightly wet fingers, gently release the dough from the sides of the bowl. Be careful not to pop all of those lovely bubbles!
Tilt the bowl and leave gravity to do the work to move the dough on the counter.
Shape the dough by doing another round of stretch and folds until you have gone full circle.
With a bench scraper or your hands, turn the dough upside down, so the seam is now on the counter. Cover the dough with the bowl and let it rest for 30 minutes.
While you are waiting for the dough to rest, prepare your proofing basket. This can either be a banneton or a small mixing bowl lined with a tea towel. The purpose of this proofing basket is to keep the tight shape that you will create, so make sure you are using a standard bowl that is small enough to help keep the shape.
Doughs with cinnamon sugar fillings are notorious for leaking. Therefore, I like to line my bannetons with at least 2 clean tea towels, just in case. Otherwise, dust the banneton or the tea towel with flour (most will say to use rice flour, but I have used just regular all-purpose flour) to prevent sticking.
Cinnamon Filling
Add the softened butter to a bowl of a stand mixer with the paddle attachment. This can be done with a hand mixer.
To the butter, add the brown sugar, cinnamon and flour. Mix on medium/low speed for about 2 minutes, or until the ingredients are combined and a paste is formed.
Final shape
After 30 minutes of rest, flip the dough, with the seamed side up.
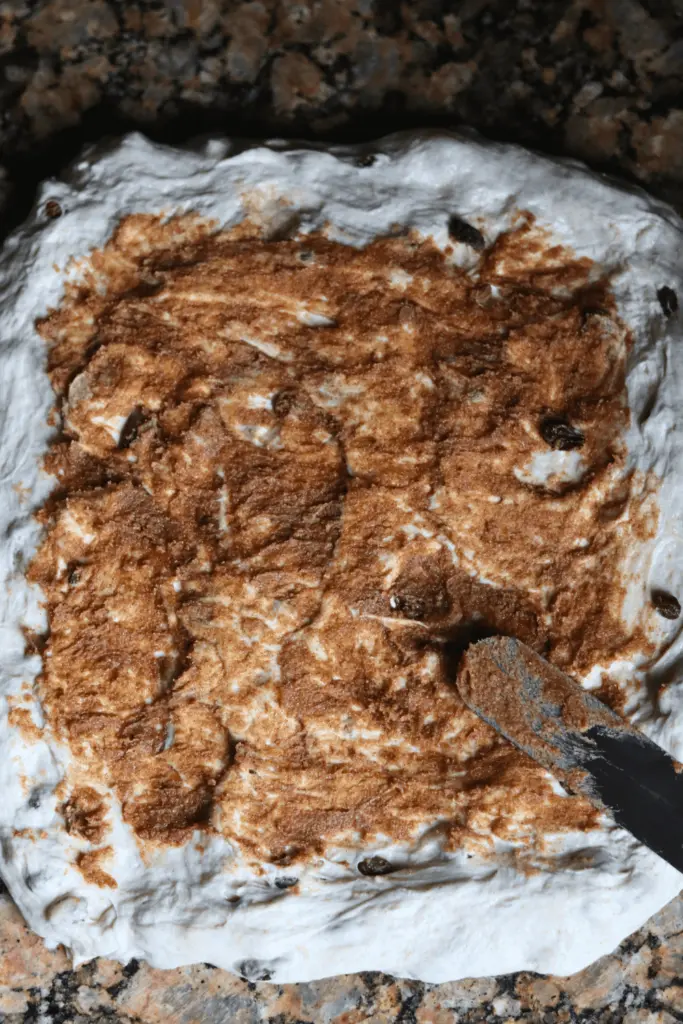
Gently stretch the dough into a large rectangle, about 10 x 11 inches (does not need to be exact), this is called the lamination technique. Refer to the pictures above. Be careful not to stretch any sections of the dough too thinly, as the raisins and cinnamon sugar will break through.
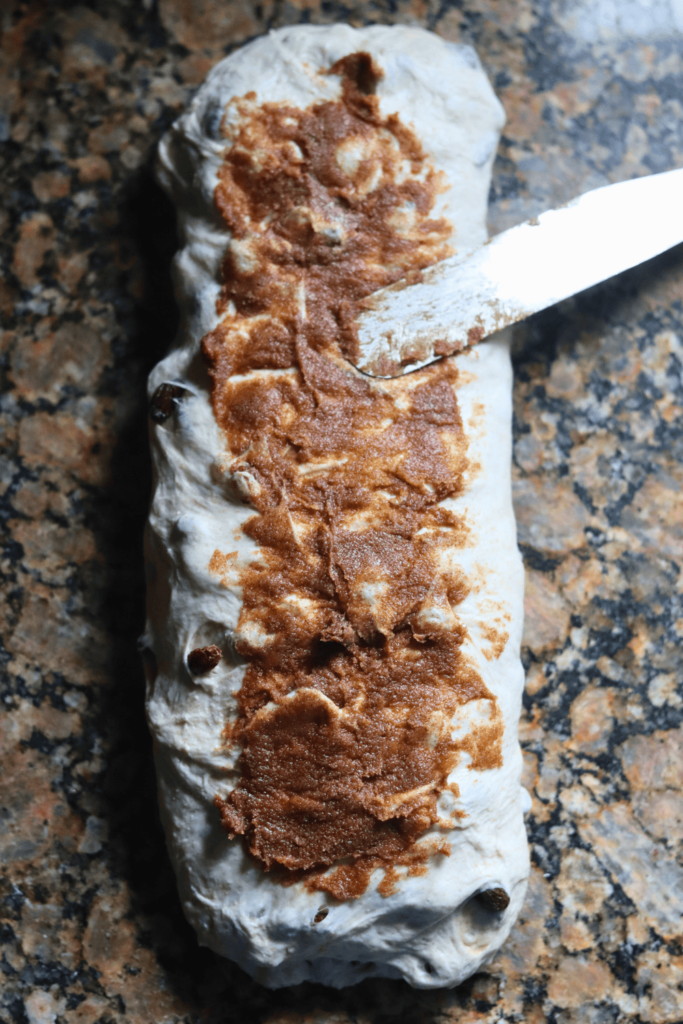
Spread half of the cinnamon sugar filling over the top of the dough, leaving at least an inch perimeter around the dough without the filling. This helps to seal the dough when shaping.
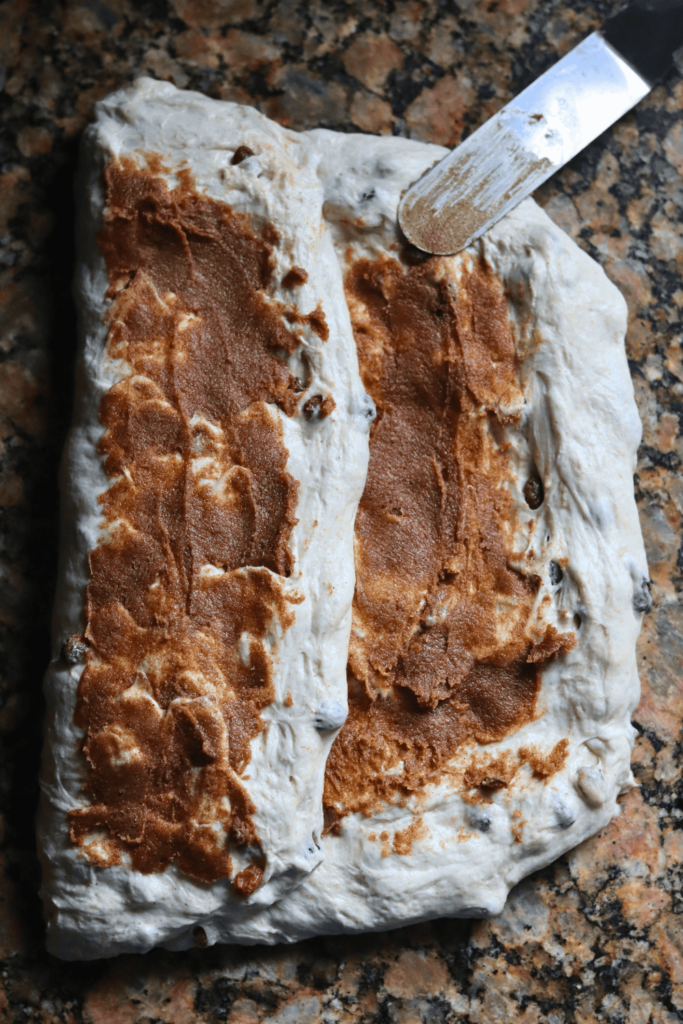
Next, take the left side of the dough and fold it towards the middle. Spread 1/2 of the remaining cinnamon filling on top of this new section.
Finally, take the right side of the dough and fold that towards the middle on top of the last section, like a tri-fold. Spread the remaining cinnamon filling on top.
Now, roll up the dough, starting with the part of the dough closest to you.
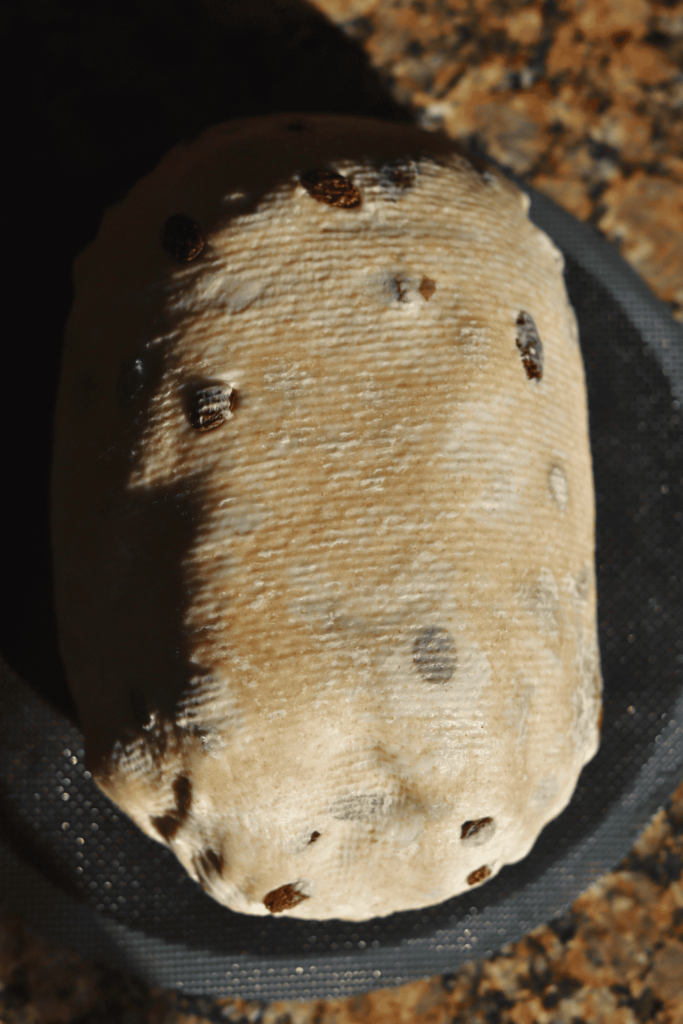
For a boule shape, gently cup your hands around the dough ball. Turn the ball in a clockwise motion about a quarter turn and then softly pull the dough towards you. Do this repeatedly until you see the dough form a tighter and more round shape. With a bench scraper or just your hands, carefully scope up the dough and lay it upside down (seam side up) into your tea towel-lined/floured proofing basket and cover it with a plastic bag or a shower cap.
For a batard shape, pinch the seams of each end close, then gently place the rolled up dough into the prepared banneton (seam side up). Cover it with plastic bag or a shower cap.
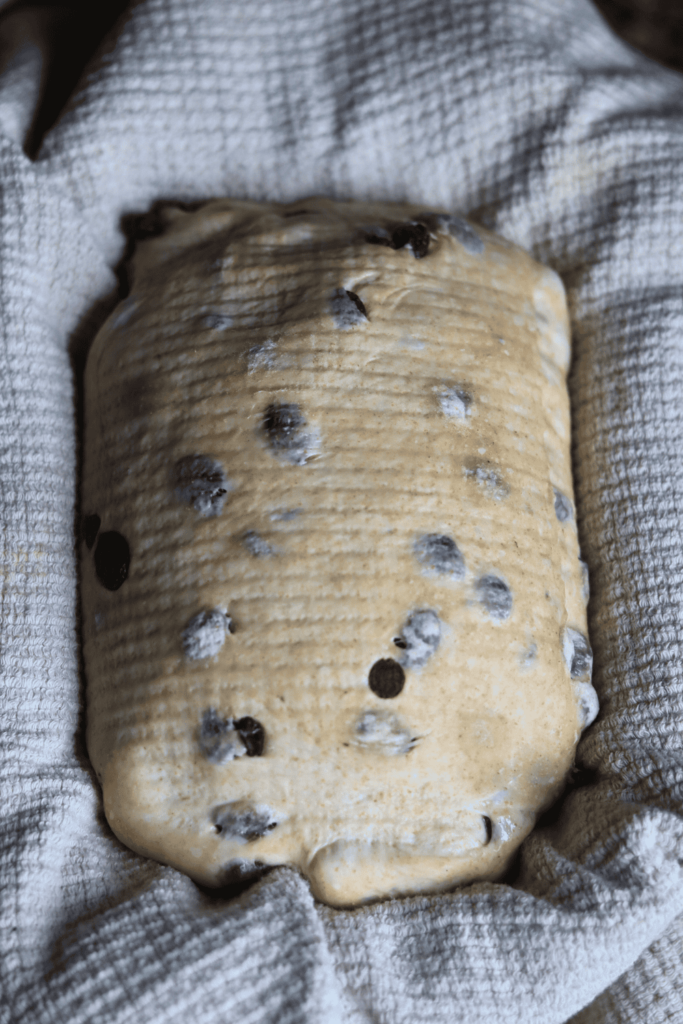
Cold proof
Place your proofing basket in the fridge to cold proof for 8-72 hours.
Placing your dough in the fridge slows down the fermentation process, which deepens the flavors of your loaf. It also gives you flexibility in when you want to bake your bread.
But don’t wait too long! If left in the fridge for too long, your dough will over-ferment, causing the dough to not be able to rise while baking.
Score
Thirty minutes before baking, place the dough in the freezer. The cooler temperatures tighten up the dough which helps with the scoring design.
At the same time, place your Dutch oven in your oven and preheat to 500 degrees F. Allow the Dutch oven to preheat for at least 30 minutes.
Place a piece of parchment paper on your workspace and gently flip the banneton upside down over the parchment paper. Since you dusted the banneton, your dough should slowly release and fall onto the parchment paper, landing in the middle with the floured side facing up.
With a lame / razor blade or sharp knife, score a crescent moon shape on top of the dough. This is necessary for your bread to be able to expand while baking.
Grab the corners of the parchment paper and carefully place the Sourdough Cinnamon Raisin dough into your preheated Dutch Oven and cover with the lid.
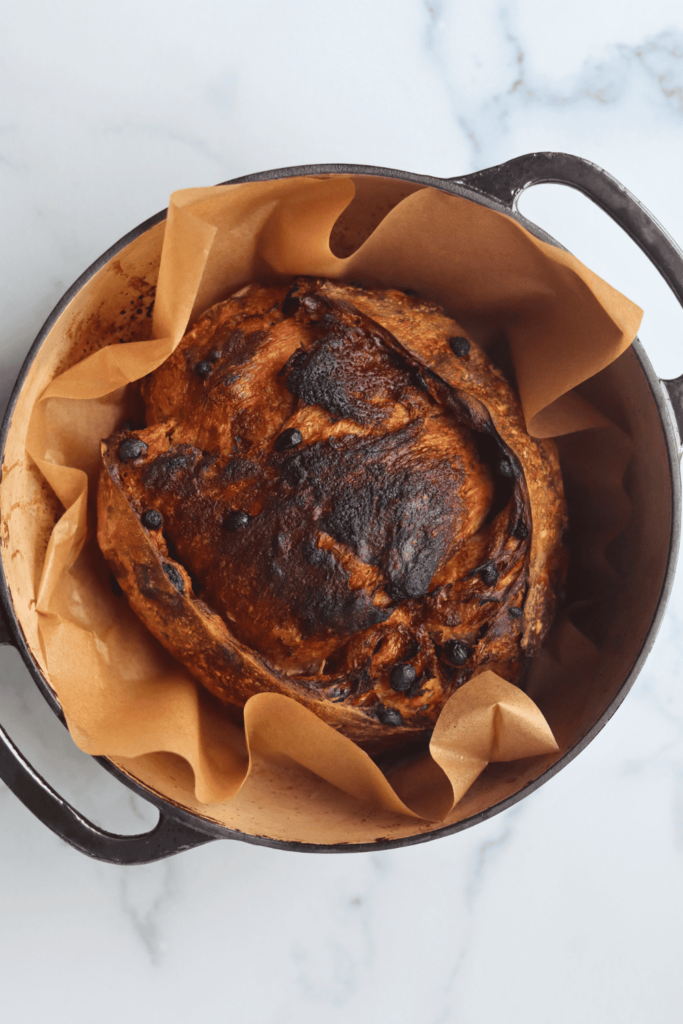
Reduce the temperature to 450 degrees F and bake the sourdough raisin bread Bread covered for 30 minutes. Then remove the lid of the Dutch oven, reduce the oven temperature to 425 degrees F and continue to bake the bread for an additional 20 minutes or until the internal temperature reaches 205 degrees F with the lid off. Keep an eye on the cinnamon sugar filling. If it is browning too much, cover the loaf with aluminum foil while the bread continues to bake.
Once golden brown, remove the Dutch Oven from your oven.
Using the corners of the parchment paper, lift the sourdough bread out of the Dutch oven and place it onto a wire rack to cool.
Allow your homemade bread to cool for at least 1 hour before cutting into it. (I know!! How can you possibly wait when it looks and smells so good?! But trust me, if you cut in too soon, your masterpiece will turn mushy and gummy.)
In the meantime, listen to your loaf “sing” its little tune to you with every crinkle and crack!
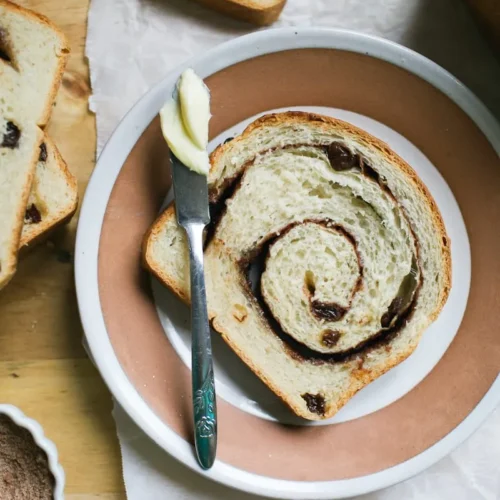
Once the hour is up, slice into your work of art, slather on some butter and enjoy!
How to Serve Cinnamon Raisin Sourdough
Cinnamon Raisin Sourdough is incredibly versatile and delicious in the simplest ways. Fresh from the loaf, slice it at room temperature and spread with salted butter the natural sourdough tang paired with sweet raisins and warm cinnamon needs nothing else. For a heartier treat, toast a thick slice until golden and top with cream cheese, honey, almond butter, or your favorite jam.
Looking for something more indulgent? Day-old Cinnamon Raisin Sourdough makes an exceptional French toast the sourdough tang beautifully balances the sweetness. It also pairs wonderfully alongside a hot cup of coffee, chai, or spiced tea for a cozy, complete breakfast experience.
How to Store Cinnamon Raisin Sourdough
For short-term storage, wrap your loaf in a beeswax wrap, linen bread bag, or clean kitchen towel and keep it on the counter for up to 1–3 days. Avoid plastic bags they trap moisture and turn your crust soft and soggy. Skip the refrigerator too, as cold temperatures actually accelerate staling in sourdough by causing the starches to retrograde faster.
For longer storage, the freezer is your best friend. Slice the entire loaf first, wrap tightly in plastic wrap, place in a freezer-safe zip bag, and freeze for up to 3 months. When ready to serve, toast slices straight from frozen no thawing needed. If your loaf has gone stale, simply sprinkle it lightly with water, wrap in foil, and bake at 350°F (175°C) for 10–15 minutes to bring it back to life.

For More Guidance:
Why You’ll Love This Recipe
Flour
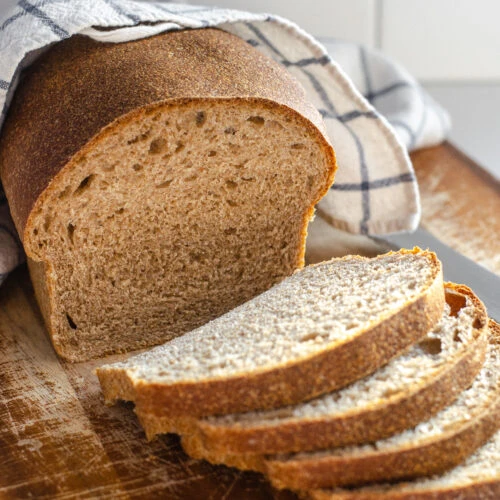
The foundation of this recipe is bread flour, which provides the strong gluten structure needed to support the sourdough fermentation process. Its higher protein content gives the loaf its signature chewy crumb and helps the dough hold its shape beautifully during the long rise. A portion of whole wheat flour is also added to deepen the flavor, add a subtle nuttiness, and boost the overall nutritional profile of the bread.
If bread flour isn’t available, all-purpose flour works as a substitute, though the crumb may be slightly less chewy. For a heartier, more rustic loaf, you can increase the whole wheat flour ratio — just keep in mind it will produce a denser texture. The right flour combination truly sets the foundation for everything else in this recipe.
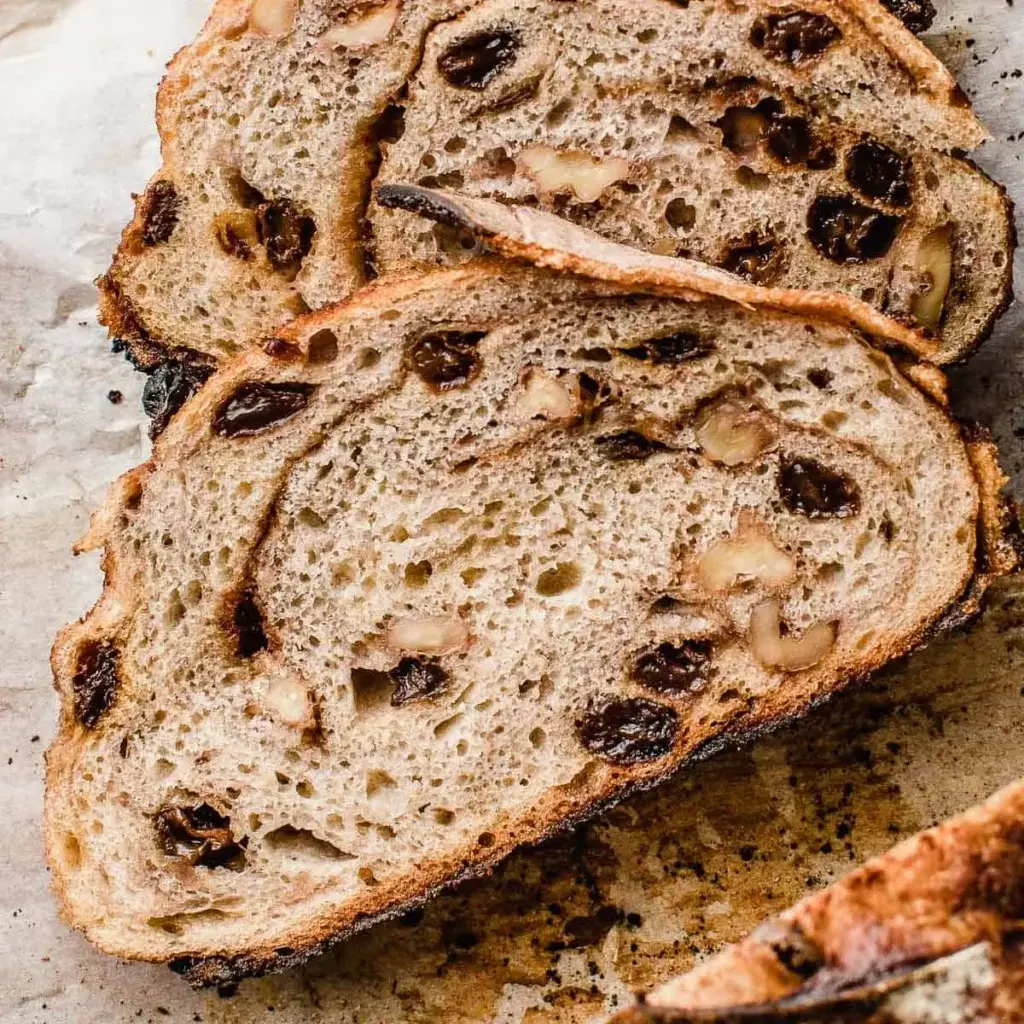
Inclusions
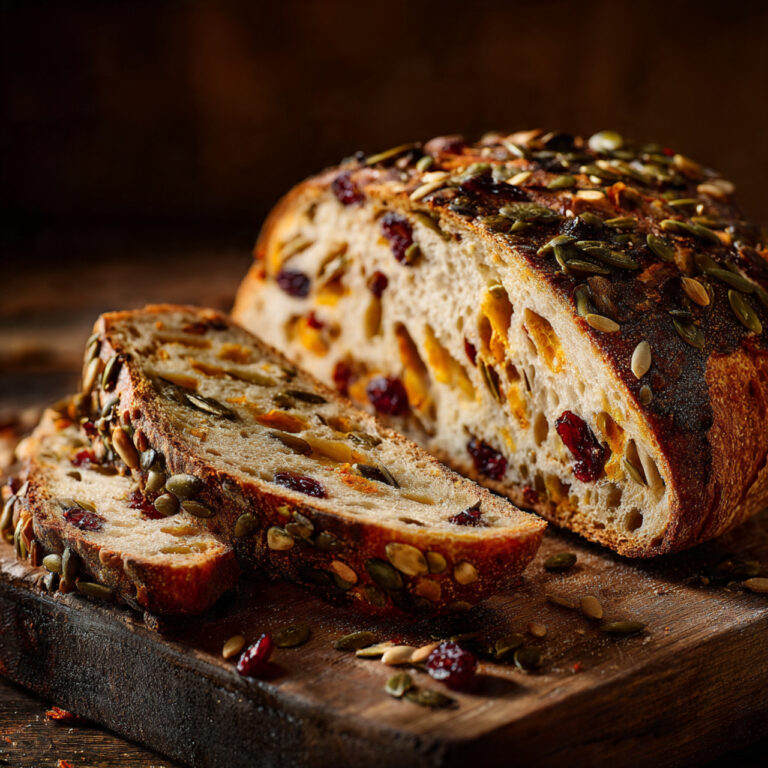
The star inclusions in this recipe are plump, juicy raisins — soaked in warm water before adding to the dough to keep them moist throughout the bake and prevent them from drying out or burning. Their natural sweetness distributes beautifully through the crumb, giving you little pockets of flavor in every slice. Regular raisins work perfectly, but golden raisins are a wonderful alternative for a slightly milder, fruitier sweetness.
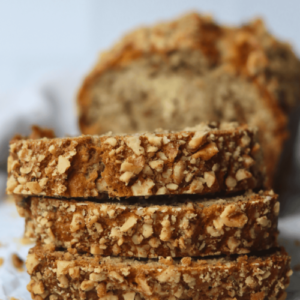
Beyond raisins, you can customize your inclusions to make the loaf your own. Dried cranberries, chopped dates, or currants all pair exceptionally well with the cinnamon swirl. For added texture and richness, a handful of toasted walnuts or pecans folded into the dough takes this bread to a whole new level of flavor and complexity.
Swirl
The cinnamon swirl is what makes this loaf truly special — a generous mixture of ground cinnamon, brown sugar, and a touch of melted butter spread across the rolled-out dough before shaping. As the bread bakes, the swirl caramelizes slightly, creating beautiful ribbons of warm spiced sweetness woven throughout the entire loaf. It adds flavor, aroma, and that signature marbled look when sliced.
For the best swirl results, spread the mixture evenly all the way to the edges, leaving only a small border to prevent the filling from leaking during baking. Ceylon cinnamon is highly recommended over regular cassia cinnamon for a more delicate, complex flavor. A pinch of cardamom or nutmeg added to the swirl mixture is a small upgrade that makes a surprisingly big difference in the final taste.
Frequently Asked Questions
Can you add the spices to the dough?
Cinnamon has antimicrobial properties that can slow down the fermentation in a loaf, so I would not recommend adding the spices directly into the dough. However, if you’d prefer skipping the cinnamon sugar filling, you can sprinkle ground cinnamon onto the dough, using the lamination technique, while shaping your loaf.
Can you use all bread flour?
Yes. If you prefer to skip the whole wheat flour, increase the bread flour to 500g and reduce the water to 350g.
Why is the dough placed in the freezer before scoring?
Chilling the dough in the freezer firms up the surface, making it easier to score clean, precise lines. This helps control how the dough expands in the oven, leading to a well-defined pattern and better oven spring.
How does temperature affect bulk fermentation time and readiness?
Bulk fermentation length depends on room temperature. Warmer environments speed it up, while cooler ones slow it down. The dough is ready when it has increased in size by at least 75% and be domed on top, looks light and puffy, joggles when shaken and has visible bubble on top and throughout the dough.
Happy baking!
Cinnamon Raisin Sourdough Bread Recipe
Ingredients
Dough
- 50 grams 1/4 cup active sourdough starter
- 400 grams 1 2/3 cups filtered water, room temperature
- 425 grams 3 cups bread flour
- 75 grams 1/2 cup whole wheat flour
- 10 grams 1 1/2 teaspoons salt
- 120 grams 1 cup raisins
- 8 grams 2 teaspoons vanilla extract, optional
Cinnamon Sugar Filling
- 57 grams 1/4 cup unsalted butter, softened
- 55 grams 1/4 cup brown sugar
- 6 grams 1 Tablespoon ground cinnamon
- 5 grams 1 1/2 teaspoons all-purpose flour
Instructions
Make the dough
- In a large mixing bowl, add the active sourdough starter and room-temperature filtered water. Mix with a Danish dough whisk or with your hand until it looks like a milky liquid.
- 50g (1/4 c) active sourdough starter, 400g (1 2/3 c) filtered water, room temperature
- Then, add the bread flour, whole wheat flour and salt. Again, mix with a whisk or by hand. Be sure to mix until all of the flour is incorporated.
- This is also a higher hydration dough, so the dough will seem sticker and eventually more elastic than compared to my Beginner’s Sourdough Loaf recipe.
- 425g (3 c) bread flour, 75g (1/2 c) whole wheat flour, 10g (1 1/2 tsp) salt
- Cover the bowl with a reusable shower cap and let the dough rest for at least a half hour before you move on to the next step.
Inclusions
- While the dough rests, prepare your raisins. You can add dried raisins as they are, but I prefer plumping them up beforehand.
- To do so, add the raisins to a bowl and cover them with boiling water for at least 30 minutes. Once plump, drain the raisins and thoroughly pat them dry.
- 120g (1 c) raisins
- For even more flavor, try adding vanilla extract to the boiling water while your raisins soak!
- 8g (2 tsp) vanilla extract (optional)
Stretch and folds
- After thirty minutes, remove the cover. With a bowl scraper, scrape the dough away from the bowl. Then pour the raisins on top of the dough.
- With slightly wet hands, reach down to the bottom of the bowl, grab a section of the dough and stretch the bread dough above itself. Then fold it over on top of the dough. Rotate your bowl clockwise a quarter of the way and repeat identical stretch and fold. Repeat the process until you come full circle. You will notice the dough will start to look much smoother than before. Cover and let the dough rest for another 30 minutes.
- Repeat the same stretch and folds 3 more times, for a total of 4 sets. Cover the dough and wait for at least 30 minutes of rest in between each set.
- Once you have completed the final set of stretch and folds, cover the dough and let it rest for the remainder of the bulk fermentation at room temperature, about 9-11 more hours if the dough is kept at 68-70 degrees F.
Bulk fermentation
- Now this is the most finicky part of sourdough. There isn’t a set time for your bulk ferment. It is greatly dependent on the temperature of your environment. The warmer it is, the faster your dough will ferment. The opposite is true for cooler temperatures.
- In an environment of 68-70 degrees, doughs will typically bulk ferment for 9-11 hours more after the stretch and folds, but again, you will have to look for the signs that your dough is done fermenting, rather than the clock. Warmer temperatures will be faster, while cooler temperatures will be slower.
Here’s what to look for:
- The dough should have increased in size by at least 75% and be domed on top.
- The dough looks light, and jiggles when the bowl is shaken.
- The dough should easily pull away from the bowl.
- There should be visible bubbles in the dough and on top.
- The dough doesn’t tear when you do a windowpane test
Pre-shape
- Once your dough has completed its bulk fermentation, continue on to the pre-shaping.
- With slightly wet fingers, gently release the dough from the sides of the bowl. Tilt the bowl and leave gravity to do the work to move the dough on the counter.
- Shape the dough by doing another round of stretch and folds until you have gone full circle. With a bench scraper or your hands, turn the dough upside down, so the seam is now on the counter. Cover the dough with the bowl and let it rest for 30 minutes.
- While you are waiting for the dough to rest, prepare your proofing basket. Line a banneton with a tea towel, then dust it with flour to prevent sticking. Doughs with cinnamon sugar fillings are notorious for leaking. Therefore, I like to line my bannetons with at least 2 clean tea towels, just in case.
Cinnamon Filling
- Before shaping the loaf, prepare the cinnamon sugar filling. Add the softened butter, brown sugar, cinnamon and flour to a bowl of a stand mixer with the paddle attachment. . Mix on medium/low speed for about 2 minutes, or until the ingredients are combined and a paste is formed.
- This can be done with a hand mixer.
- 57g (1/4 c) unsalted butter, softened, 55g (1/4 c) brown sugar, 6g (1 T) cinnamon, 5g (1 1/2 tsp) flour
Final shape
- After 30 minutes of rest, flip the dough, with the seamed side up. Gently stretch the dough into a large rectangle, about 10 x 11 inches (does not need to be exact). Refer to the pictures above. Be careful not to stretch any sections of the dough too thinly, as the raisins and cinnamon sugar will break through.
- Spread half of the cinnamon sugar filling over the top of the dough, leaving at least an inch perimeter around the dough without the filling. This helps to seal the dough when shaping.
- Next, take the left side of the dough and fold it towards the middle. Spread 1/2 of the remaining cinnamon filling on top of this new section.
- Finally, take the right side of the dough and fold that towards the middle on top of the last section, like a tri-fold. Spread the remaining cinnamon filling on top. Now, roll up the dough, starting with the part of the dough closest to you.
- For a boule shape, gently cup your hands around the dough ball. Turn the ball in a clockwise motion about a quarter turn and then softly pull the dough towards you. Do this repeatedly until you see the dough form a tighter and more round shape. With a bench scraper or just your hands, carefully scope up the dough and lay it upside down (seam side up) into your tea towel-lined/floured proofing basket and cover it with a plastic bag or a shower cap.
- For a batard shape, pinch the seams of each end, then gently place the rolled up dough into the prepared banneton (seam side up). Cover it with plastic bag or a shower cap.
Cold proof
- Place your proofing basket in the fridge to cold proof for 8-72 hours.
- Placing your dough in the fridge slows down the fermentation process, which deepens the flavors of your loaf. It also gives you flexibility in when you want to bake your bread.
Score
- Thirty minutes before baking, place the dough in the freezer.
- The cooler temperatures tighten up the dough which helps with the scoring design.
- At the same time, place your Dutch oven in your oven and preheat to 500 degrees F. Allow the Dutch oven to preheat for at least 30 minutes.
- Place a piece of parchment paper on your workspace and gently flip the banneton upside down over the parchment paper.
- With a lame / razor blade or sharp knife, score a crescent moon shape on top of the dough. This is necessary for your bread to be able to expand while baking.
- Grab the corners of the parchment paper and carefully place the Sourdough Cinnamon Raisin dough into your preheated Dutch Oven and cover with the lid.
- Reduce the temperature to 450 degrees F and bake the Cinnamon Raisin Sourdough Bread covered for 30 minutes. Then remove the lid of the Dutch oven. reduce the temperature to 425 degrees F and continue to bake the bread for an additional 20 minutes or until the internal temperature of the loaf reaches 205 degrees F with the lid off.
- Keep an eye on the cinnamon sugar filling. If it is browning too much, cover the loaf with aluminum foil while the bread continues to bake.
- Once golden brown, remove the Dutch Oven from your oven. Using the corners of the parchment paper, lift the sourdough bread out of the Dutch oven and place it onto a wire rack to cool.
- Allow your homemade bread to cool for at least 1 hour before cutting into it. Once the hour is up, slice into your work of art, slather on some butter and enjoy!