Delicious Sourdough Masala Chai Bread Recipe (Easy & Aromatic!)
There is something magical about baking a loaf of chai bread on a cool, quiet morning. The scent of cardamom, cinnamon, ginger, and cloves drifting through the kitchen is enough to make anyone stop what they are doing and gather around the oven. This easy sourdough masala chai spiced tea bread recipe brings together the slow, fermented depth of a classic sourdough with the warming, aromatic soul of India’s most beloved beverage, masala chai.
Whether someone is a seasoned sourdough baker or just getting started, this recipe walks through every step with clarity and warmth. If the world of sourdough is brand new, it helps to first check out this guide to sourdough for beginners it covers all the foundational skills needed to bake this beautiful loaf with confidence. The result is a beautifully aromatic chai bread that pairs perfectly with a steaming cup of tea and makes for a showstopping addition to any breakfast table or gift basket.

Ingredients & Substitutions
* To find precise measurements, scroll to the bottom of this post to find the recipe card*
- 450g (3 ¾ cups) bread flour – A high-protein flour gives the bread its chewy, open crumb structure.
- 325g (1 ⅓ cups) water – Room temperature works best for most kitchen environments.
- 100g (½ cup) active sourdough starter – Fed and bubbly, at peak activity.
- 9g (1 ½ tsp) fine sea salt – Balances the sweetness of the spices.
- 2 tsp ground cinnamon – The warm backbone of the chai spice blend.
- 1 tsp ground cardamom – The fragrant star of any masala chai blend.
- ½ tsp ground ginger – Adds a gentle heat.
- ¼ tsp ground cloves – Just a hint adds incredible depth.
- ¼ tsp ground black pepper – A traditional masala chai ingredient that adds a subtle kick.
- 2 tbsp brown sugar or coconut sugar – Enhances the spice notes without overpowering the dough.
Filling
The filling is where this bread really shines. Swirled through the center of the loaf, it amplifies the chai flavors and creates a gorgeous, spiced interior. If the idea of a spiced swirl filling sounds appealing, it is worth noting that a similar technique is used in this cinnamon raisin sourdough bread recipe a delicious cousin in the spiced sourdough family.
- 2 tbsp softened unsalted butter
- 2 tbsp brown sugar
- 1 tsp ground cinnamon
- ½ tsp ground cardamom
- ¼ tsp ground ginger
- Pinch of ground cloves
Simply mix these together into a smooth paste before shaping time. The filling can be adjusted to taste a little more cardamom makes it bolder, while extra brown sugar gives a more caramel-like sweetness.
Whipped Chai Butter
This optional but highly recommended accompaniment elevates the whole experience. Spread generously over a warm slice of chai bread, it turns a lovely loaf into something truly special. Those who enjoy baked treats with a warm, spiced finish may also want to try this sourdough coffee cake another beautiful option for a cozy morning bake.
- ½ cup (115g) unsalted butter, softened to room temperature
- 1 tsp ground cinnamon
- ½ tsp ground cardamom
- ¼ tsp ground ginger
- Pinch of cloves and black pepper
- 1–2 tbsp honey or powdered sugar, to taste
- Pinch of fine sea salt
Using a hand mixer or a stand mixer with a whisk attachment, whip the butter until light and fluffy about two to three minutes. Add the spices, sweetener, and salt, then continue whipping until fully combined and airy. Transfer to a small jar and refrigerate until ready to use. It keeps well for up to two weeks.
Supplies
Before beginning, it helps to have the right tools on hand. Here is what the recipe calls for:
- Large mixing bowl
- Kitchen scale (for accurate measurements)
- Bench scraper
- Dutch oven or heavy-lidded baking vessel
- Banneton (proofing basket) or a bowl lined with a well-floured cloth
- Sharp bread lame or razor blade for scoring
- Plastic wrap or a shower cap for covering the dough
- Cooling rack
A kitchen scale is strongly recommended. Sourdough baking rewards precision, and measuring by weight rather than volume makes a significant difference in consistency.
Want to Make Your Own Sourdough Starter?
For anyone who does not yet have a sourdough starter, creating one from scratch is a deeply rewarding process and it only takes about five to seven days. There is a complete, step-by-step guide on how to make a sourdough starter available on Baking Starter, which walks through everything from day one to the first successful bake.
Each day, a small portion of the mixture is discarded and replaced with fresh flour and water. Over time, wild yeasts and beneficial bacteria naturally present in the flour and the environment begin to colonize the mixture, creating a living culture that leavens bread without any commercial yeast.
The starter is ready to use when it reliably doubles in size within four to eight hours after feeding, smells pleasantly tangy (like yogurt or mild vinegar), and has a bubbly, airy texture. A starter with this level of activity will give the sourdough chai bread a beautiful rise and that signature fermented flavor that makes it so distinctive.
Baker’s Schedule #1
This schedule is designed for bakers who want to bake the bread fresh on the morning of Day 3. It fits naturally into a typical weekday routine.
DAY 1
Evening (around 6–8 PM): Feed the sourdough starter. Use a ratio of 1:5:5 (one part starter, five parts flour, five parts water) for a robust, active levain. Cover loosely and leave at room temperature overnight.
DAY 2
Morning (7–9 AM): Mix the dough. Combine flour, water, active starter, and sugar. Autolyse (rest) for 30–60 minutes. Add salt and chai spices, then incorporate thoroughly.
Throughout the day (every 30 minutes for the first 2–3 hours): Perform stretch and fold sets. Four sets total.
Afternoon: Allow the dough to bulk ferment at room temperature until it has grown by 50–75% and shows signs of activity.
Evening: Pre-shape, rest for 20–30 minutes, add the filling, final shape, and place into the banneton. Cover and refrigerate overnight.
DAY 3
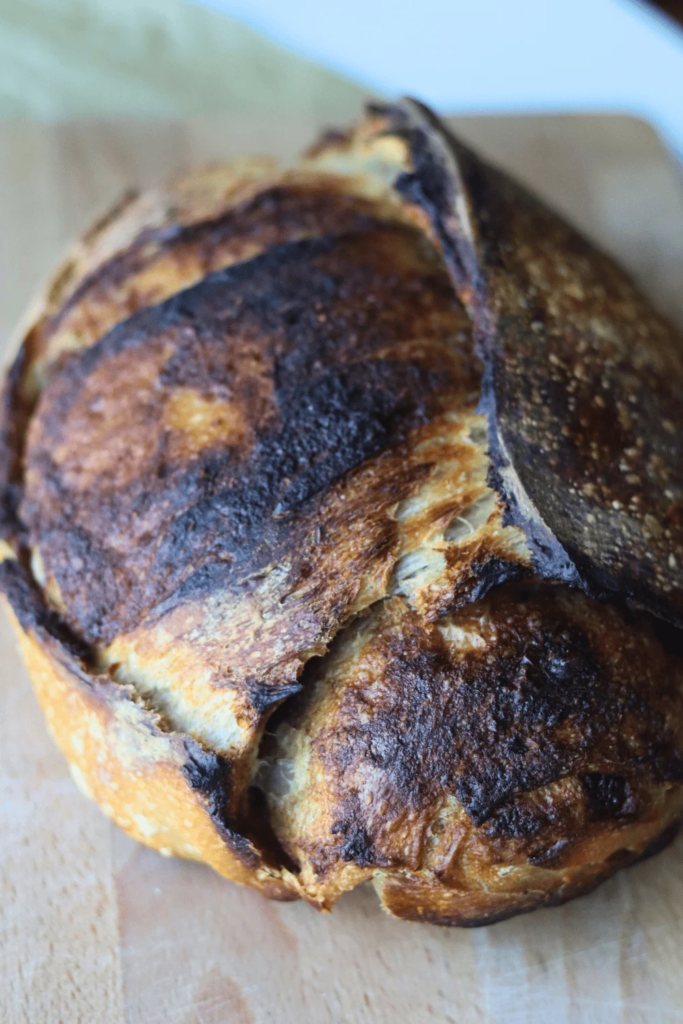
Morning: Preheat the Dutch oven, score the cold dough straight from the refrigerator, and bake to a deep, mahogany crust.
Baker’s Schedule #2
This schedule is ideal for weekend bakers who prefer to mix in the morning and bake the same day or the following morning. For more flexible overnight sourdough ideas, the 15 best sourdough overnight recipes for beginners is a great place to explore additional scheduling options.
DAY 1
Morning (8–9 AM): Feed the starter early. By mid-morning it should be active and ready to use.
Mid-morning (10–11 AM): Mix the dough. Autolyse, add spices, salt, and starter. Begin stretch and fold sets every 30 minutes.
Afternoon: Continue bulk fermentation at a warm room temperature (75–78°F / 24–26°C) for a faster rise.
Late afternoon: Pre-shape, rest, add filling, final shape. Cold proof in the refrigerator overnight or for a minimum of 8 hours.
DAY 2
Morning: Preheat the Dutch oven in a 500°F (260°C) oven for at least 45–60 minutes. Score the dough directly from the refrigerator and bake immediately.
💡Sourdough Tip: Not sure if your discard is the right hydration for this recipe? Use our free Sourdough Hydration Calculator to check your starter ratios before baking. A 100% hydration discard works perfectly in this recipe as written.
How to Make Sourdough Chai Bread
Here is a full walkthrough of the process, step by step. The goal is to make this easy sourdough masala chai spiced tea bread recipe feel completely manageable, even for those relatively new to sourdough.
Feed Your Sourdough Starter
Eight to twelve hours before mixing the dough, feed the starter so that it reaches peak activity at the right time. A starter is at peak when it has doubled or tripled in volume, has a domed top, and smells pleasantly sour and slightly fruity. If there is any uncertainty about whether it is ready, drop a small spoonful into a glass of water if it floats, it is ready to leaven bread.
For this sourdough chai bread, using a starter at its peak is essential. A sluggish or under-fed starter will produce a dense loaf that will not do justice to the beautiful spice blend inside.
Make the Dough
In a large mixing bowl, combine the bread flour and water. Mix until no dry flour remains. This step called autolyse allows the flour to fully hydrate and begins gluten development before any other ingredients are added. Cover the bowl and let it rest for 30 to 60 minutes.
After the autolyse, add the active sourdough starter, chai spices, brown sugar, and salt. Work everything in with damp hands, using a pinching and folding motion until all ingredients are fully incorporated. The dough will feel sticky at first this is completely normal. Resist the urge to add extra flour.
Stretch and Folds
Stretch and folds replace the traditional kneading step in this style of sourdough baking. They build gluten strength gradually without overworking the dough and without the mess of vigorous kneading.
To perform a set: with wet hands, grab one side of the dough, stretch it upward as far as it will go without tearing, then fold it over the center. Rotate the bowl 90 degrees and repeat. Continue all the way around four stretches make one set.
Perform four sets total, spaced 30 minutes apart. After each set, the dough will feel noticeably more elastic and less sticky. By the final set, it should hold its shape much better and feel smooth and supple.
Bulk Fermentation
After the stretch and fold sets are complete, it is time for bulk fermentation. This is the first long rise, during which the sourdough culture works through the dough, producing carbon dioxide that creates those signature air pockets and developing the tangy, complex flavor that makes this chai bread so distinctive.
Cover the bowl and leave the dough at room temperature. Bulk fermentation time varies depending on the temperature of the kitchen and the strength of the starter. In a warm kitchen (75–78°F / 24–26°C), it typically takes four to six hours. In a cooler environment, it may take eight to ten hours or more.
Here’s What to Look For:
Knowing when bulk fermentation is complete is one of the most important skills in sourdough baking. It is also where many bakers run into trouble so it helps to know exactly what the signs of proper fermentation look like. For a deeper dive into reading the dough, this guide on how to identify underproofed sourdough bread is extremely useful. Here are the key signs to watch for:
- The dough has grown by 50–75% in volume (not necessarily doubled).
- The surface looks slightly domed and jiggly when the bowl is gently shaken.
- Bubbles are visible on the surface and sides of the dough.
- A small piece of dough pulled away feels light and airy, not dense and heavy.
- The dough has a pleasantly sour, yeasty aroma.
It is better to err on the side of slightly under-fermented than over-fermented. An over-proofed dough becomes too acidic and loses the gas retention capacity it needs to rise in the oven.
Pre-shape
Lightly flour the work surface and gently turn the dough out. Using a bench scraper and damp hand, pull the dough toward the baker in a dragging motion, using the surface tension to create a smooth, taut skin on the outside of the dough ball. Let it rest uncovered for 20 to 30 minutes. This resting period, called the bench rest, allows the gluten to relax and makes the final shaping much easier.
Chai Filling
This is the step that takes the sourdough chai bread from wonderful to truly unforgettable. The chai filling is swirled into the dough during the final shaping process, creating a gorgeous, spiced ribbon through the crumb. Fans of spiced sourdough loaves may also love this warmly flavored sourdough gingerbread quick bread as a no-fuss companion recipe when time is short.
After the bench rest, gently flatten the dough into a rough rectangle no rolling pin is needed, just light pressure from the hands. Spread the chai filling evenly across the surface, leaving a one-inch border around the edges. Roll the dough tightly from one short end to the other, creating a log shape. Then pinch the seam closed along the bottom and sides.
Final Shape
Now that the filling is incorporated, the dough needs to be shaped into its final form either a batard (oval) or a boule (round), depending on the proofing basket available.
For a batard: fold the dough in thirds like a letter, then roll it tightly toward the baker to build surface tension. Seal the seam and place the dough seam-side up in a well-floured oval banneton.
For a boule: cup the hands around the dough and drag it toward the baker in a circular motion, using the work surface to create tension. Place it seam-side up in a round, well-floured banneton.
Cover lightly with a shower cap or plastic wrap to prevent the surface from drying out.
Cold Proof
Transfer the covered banneton to the refrigerator and allow the dough to cold proof for 8 to 16 hours. This extended cold fermentation develops flavor further and makes the dough easier to score. It also gives the baker flexibility the dough can stay in the refrigerator for up to 48 hours if needed, making this sourdough masala chai spiced tea bread recipe highly adaptable to busy schedules. For more bread-baking ideas built around overnight cold proofing, the collection of sourdough overnight recipes for beginners is full of inspiration.
Cold proofing also makes the dough firm enough to score cleanly and gives the bread better oven spring that dramatic burst of rise during the first 15 minutes of baking.
Score
Preheat the oven to 500°F (260°C) with a Dutch oven inside for at least 45 to 60 minutes. The Dutch oven must be screaming hot before the dough goes in.
When ready to bake, remove the dough from the refrigerator. Flip it out of the banneton onto a piece of parchment paper. Working quickly with a sharp bread lame or razor blade, score the dough. A simple, confident slash down the center at a 30-degree angle allows the bread to expand properly. For something more decorative, a curved ear score or a simple leaf pattern both look striking on this chai bread.
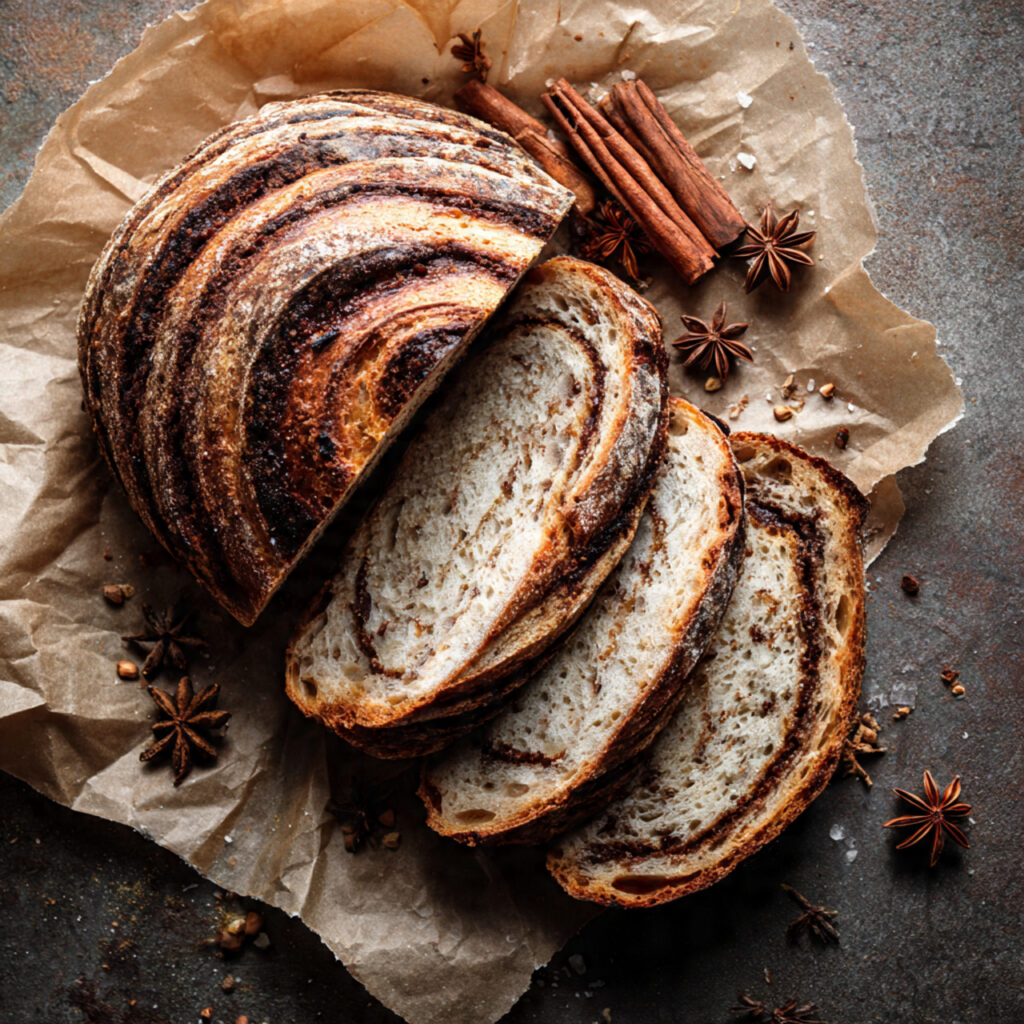
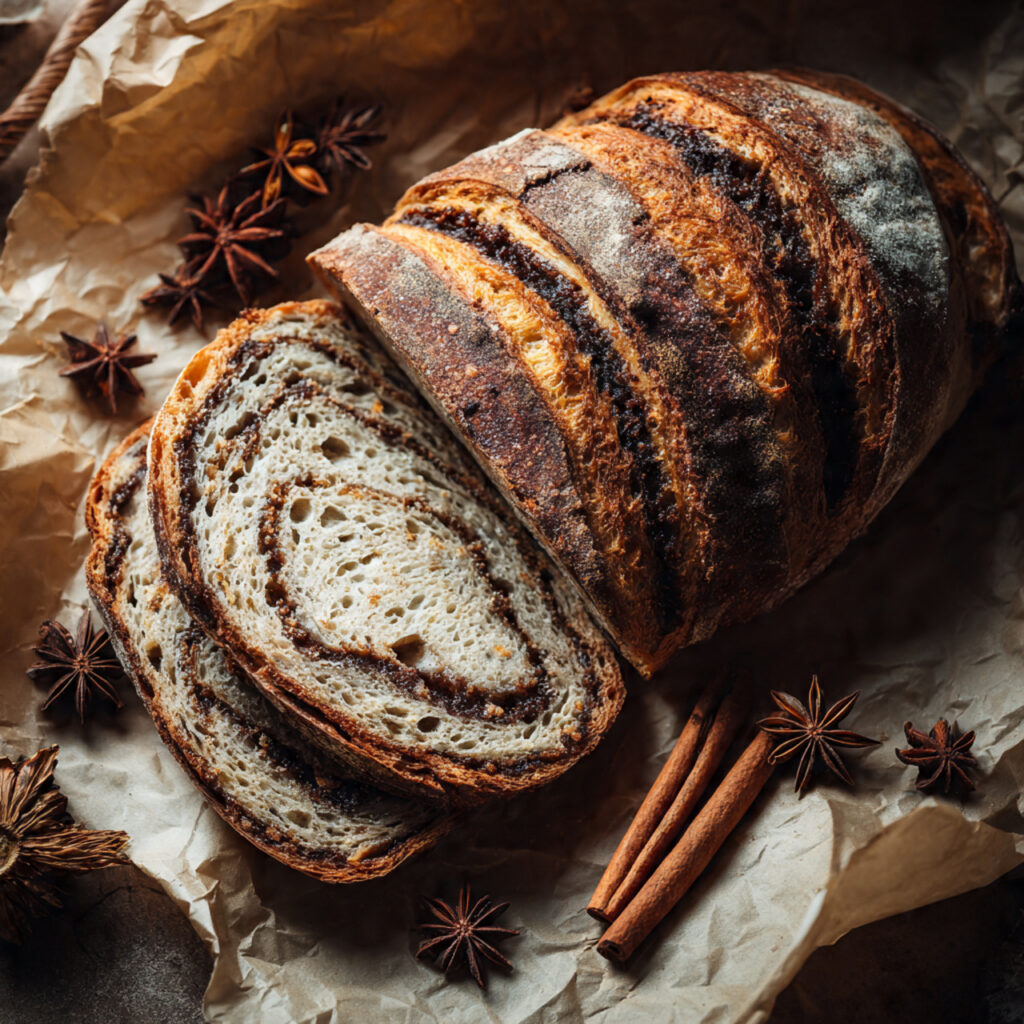
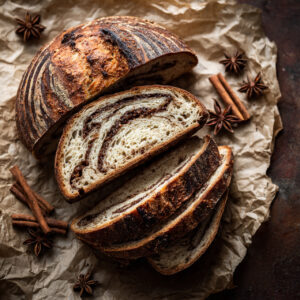
Lift the parchment with the dough into the preheated Dutch oven. Put the lid on and bake for 20 minutes. Then remove the lid and reduce the oven temperature to 450°F (230°C). Continue baking for another 20–25 minutes until the crust is a deep, mahogany brown and the internal temperature reads 205–210°F (96–99°C) on an instant-read thermometer. Transfer the bread to a wire cooling rack and resist the urge to cut into it immediately the crumb is still setting inside. Allow it to cool for at least one hour before slicing. Once cut, this beautiful loaf reveals its aromatic, spiced interior and the swirl of chai filling that runs through each slice.
A Final Note
Whether it is enjoyed as a casual weekend bake or presented as a thoughtful homemade gift, this easy sourdough masala chai spiced tea bread recipe is the kind of project that rewards every bit of effort put into it. The combination of sourdough’s complexity and the warming fragrance of chai bread india-inspired spices makes it a recipe that bakers will return to again and again. For those who want to explore more delicious sourdough creations in a similar sweet, flavorful direction, this sourdough cranberry orange quick bread or the ever-popular sourdough banana bread are wonderful next steps on the baking journey.
Slice this chai bread thick, spread it with whipped chai butter, and enjoy it alongside a strong cup of masala chai. That is, quite simply, the perfect way to experience this bread tea-inspired creation at its very best. And if the baking bug has truly taken hold, be sure to browse Baking Starter’s full sourdough recipe collection there is always something new and delicious waiting to be baked.
How to Serve
Serve sourdough chai bread warm or at room temperature. If the loaf has been frozen, reheat it by wrapping it in foil and placing it in the oven at 300°F for around 10 minutes, which helps the bread regain its fresh texture. Pair it with butter, honey, or jam for a comforting and aromatic treat. Toasting individual slices works well too, especially if you’re reheating from the freezer.
How to Store
Keep sourdough chai bread fresh by wrapping it in a clean tea towel or storing it in a bread box at room temperature for up to 3-4 days. This protects the crust while keeping the inside soft. If you need to store it longer, place the whole loaf in an airtight bag or container and freeze it. When you’re ready to enjoy it, thaw it at room temperature. Reheat the bread by warming it in the oven at 300°F for about 10 minutes, or toast individual slices if desired, preserving both texture and flavor.
For More Guidance:
Why You’ll Love This Recipe
Before diving into the dough, here is a quick look at why this particular chai bread recipe has been winning hearts one slice at a time.
A Cozy Flavor Hug
Every bite of this bread delivers a full sensory experience. The natural tang of sourdough plays off the earthy sweetness of chai spices in a way that feels both comforting and a little adventurous. The flavor profile draws inspiration from masala chai as it has been enjoyed across India for generations bold, warming, and deeply satisfying. This is the kind of bread that tastes like a hug, and that never goes out of style.
Perfect for Sharing
This chai bread is not a loaf that quietly stays on the counter. It demands company. Sliced and served with whipped chai butter or a drizzle of honey, it makes a memorable gift for neighbors, a centerpiece for weekend brunch, or a treat to take to a holiday gathering. Because it combines the familiar with the extraordinary, it pleases a wide range of palates even people who have never had anything quite like a bread tea flavor before tend to fall in love with it at first bite.
Fun to Make
Sourdough baking can feel intimidating at first, but this recipe breaks the process into manageable steps across a relaxed schedule. The hands-on time is minimal most of the magic happens during fermentation while the baker goes about their day. For anyone who loves experimenting with flavored loaves, the sourdough inclusions guide on Baking Starter is also a wonderful resource for taking chai bread creativity even further.
Frequently Asked Questions
Can I add the spices to the dough?
While you might be tempted to incorporate spices directly into the dough for flavor, it’s best to avoid this. Cinnamon has antimicrobial properties that can slow down the fermentation in a loaf. Instead, use spices like ground cinnamon, ginger, and cardamom in your chai spice mix for the chai filling to enhance the taste without hindering the dough’s rise.
Can I use different types of flour for this recipe?
Absolutely! This recipe uses bread flour, but feel free to experiment with other options like whole wheat or rye flour. Just remember that different flours will change the texture and flavor of your bread. Whole wheat flour will make for a denser loaf, while rye flour can add a bit of an earthy taste. If you decide to try a new flour, you might want to adjust the hydration by adding a little more water or cutting back on the flour slightly to keep the dough balanced.
How can I ensure my quick bread recipe turns out fluffy and has a good bread taste?
A great bread taste and fluffy texture in your quick bread recipe comes down to balancing your wet and dry ingredients. Using a ripe starter will help the bread rise even more. At the end of the proof, check that the dough has a slightly damp side and puffy edges. Baking it in a hot baking vessel gives you the best results. For some extra flavor, try adding star anise or adjusting the tea flavor with ounces of tea steeped in hot water before mixing it in. Enjoy your freshly baked loaf!
Happy baking!
Sourdough Masala Chai Bread Recipe (Easy & Aromatic!)
Ingredients
Chai Sourdough Bread
- 50 grams heaping 1/4 cup active sourdough starter
- 55 g 1/4 cup dark brown sugar
- 350 grams 1 1/2 cups filtered, room temperature water
- 500 grams 3 1/2 cups bread flour
- 9 grams 1 1/2 teaspoons salt
Chai Filling
- 57 grams 1/4 cups unsalted butter
- 55 grams 1/4 cup dark brown sugar **see notes
- 3 grams 1 1/2 teaspoons ground cinnamon
- 1 gram 1/2 teaspoon ground ginger
- .5 gram 1/4 teaspoon ground cardamon
- .5g (1/8 teaspoon ground nutmeg
- .5 grams 1/8 teaspoon cloves
- .5 rams 1/8 teaspoon allspice
- 5 grams 1 1/2 teaspoons all-purpose flour
Whipped Chai Butter
- 57 grams 1/4 cups salted butter **see notes
- 55 grams 1/4 cup powdered sugar
- 3 grams 1 1/2 teaspoons ground cinnamon
- 1 gram 1/2 teaspoon ground ginger
- .5 gram 1/4 teaspoon ground cardamon
- .5g (1/8 teaspoon ground nutmeg
- .5 grams 1/8 teaspoon cloves
- .5 rams 1/8 teaspoon allspice
Instructions
Feed your sourdough starter
- An active starter can take around 4–12 hours to peak, so adjust to what works best for your environment.
Make the Dough
- In a large mixing bowl, add the active sourdough starter, dark brown sugar, and room-temperature filtered water. Mix with a Danish dough whisk or with your hand until it looks like tan-ish, milky liquid.
- 50g (heaping 1/4 c) active starter, 55g (1/4c) dark brown sugar, 350g (about 1 1/2 cups) room temperature water
- Then, add the bread flour and salt. Again, mix with a whisk or by hand. Be sure to mix until all of the flour is incorporated. The dough will look shaggy, not like a uniform dough ball.
- 500g (3 1/2 c) bread flour, 9g (1 1/2 tsp) salt
- Let the dough rest for at least a half hour before you move on to the next step.
Stretch and folds
- With a bowl scraper, scrape the dough away from the bowl. Now, with slightly wet hands, reach down to the bottom of the bowl, grab a section of the dough and stretch the bread dough above itself. Then fold it over on top of the dough.
- Rotate your bowl clockwise a quarter of the way and repeat identical stretch and fold. Repeat the process until you come full circle. You will notice the dough will start to look much smoother than before.
- Cover and let the dough rest for another 30 minutes.
- Repeat the same stretch and folds 3 more times, for a total of 4 sets. Cover the dough and wait for at least 30 minutes of rest in between each set.
- Once you have completed the final set of stretch and folds, cover the dough and let it rest for the remainder of the bulk fermentation on your counter top, about 9-11 more hours if the dough is kept at 68-70 degrees F.
Bulk fermentation
- Now this is the most finicky part of sourdough. There isn’t a set time for your bulk ferment. It is greatly dependent on the temperature of your environment. The warmer it is, the faster your dough will ferment. The opposite is true for cooler temperatures.
- In an environment of 68-70 degrees, doughs will typically bulk ferment for 9-11 hours more after the stretch and folds, but again, you will have to look for the signs that your dough is done fermenting, rather than the clock. Warmer temperatures will be faster, while cooler temperatures will be slower.
Here’s what to look for:
- The dough should have increased in size by at least 50% and be domed on top.
- The dough looks light, and jiggles when the bowl is shaken.
- The dough should easily pull away from the bowl.
- There should be visible bubbles in the dough and on top.
- The dough doesn’t tear when you do a windowpane test
Pre-shape
- Once your dough has completed it’s bulk ferment, it’s time to move on to the pre-shape.
- With slightly wet fingers, gently release the dough from the sides of the bowl. Be careful not to pop all of those lovely bubbles! Tilt the bowl and leave gravity to do the work to move the dough on the counter.
- Shape the dough by doing another round of stretch and folds until you have gone full circle.
- With a bench scraper or your hands, turn the dough upside down, so the seam is now on the counter. Cover the dough with the bowl and let it rest for 30 minutes.
- While you are waiting for the dough to rest, prepare your proofing basket. This can either be a banneton or a small mixing bowl lined with a tea towel. The purpose of this proofing basket is to keep the tight shape that you will create, so make sure you are using a standard bowl that is small enough to help keep the shape.
- Dust the banneton or the tea towel with flour (most will say to use rice flour, but I have used just regular all-purpose flour) to prevent sticking.
Chai Filling
- Add the softened butter to a bowl of a stand mixer with the paddle attachment. This can also be done with a hand mixer.
- 57g (1/4 c) unsalted butter
- To the butter, add dark brown sugar, cinnamon, ginger, cardamon, nutmeg, cloves, allspices, and flour. Mix on medium/low speed for about 2 minutes, or until the ingredients are combined and a paste is formed.
- 55g (1/4 c) dark brown sugar, 3g (1 1/2 tsp) ground cinnamon, 1g (1/2 tsp) ground ginger, .5g (1/4 tsp) ground cardamon, .5g (1/8 tsp) ground nutmeg, .5g (1/8 tsp) cloves, .5g (1/8 tsp) allspice, 5g (1 1/2 tsp) flour
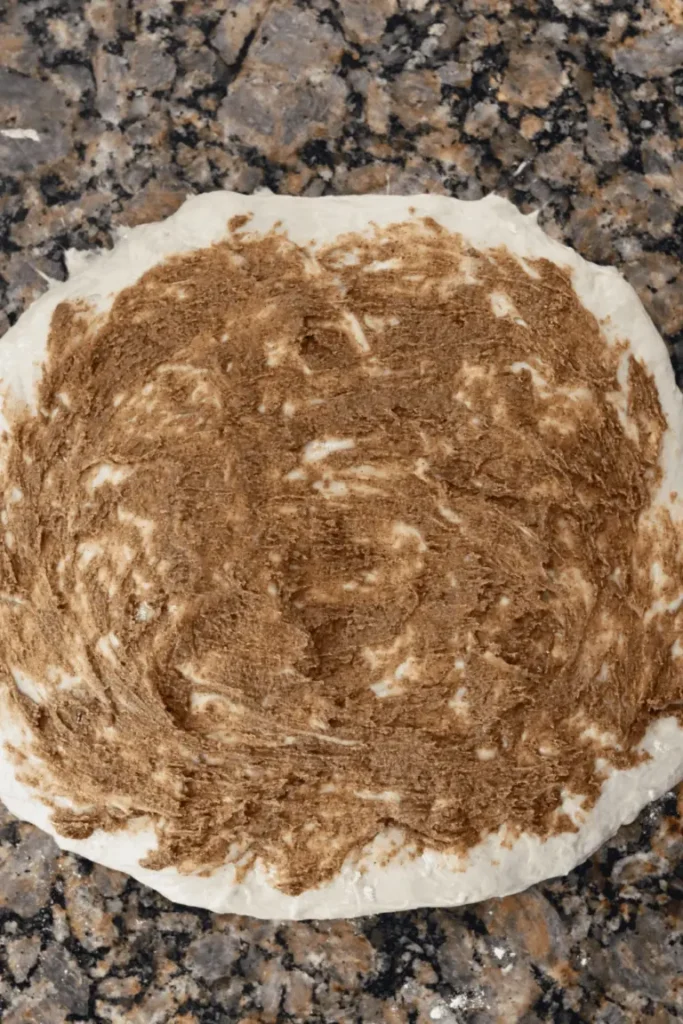
Final shape
- After 30 minutes of rest, flip the dough, with the seamed side up. Gently stretch the dough into a large rectangle, this is called lamination technique. Refer to the pictures above. Be careful not to stretch any sections of the dough too thinly.
- Spread half of the chai filling over the top of the dough.
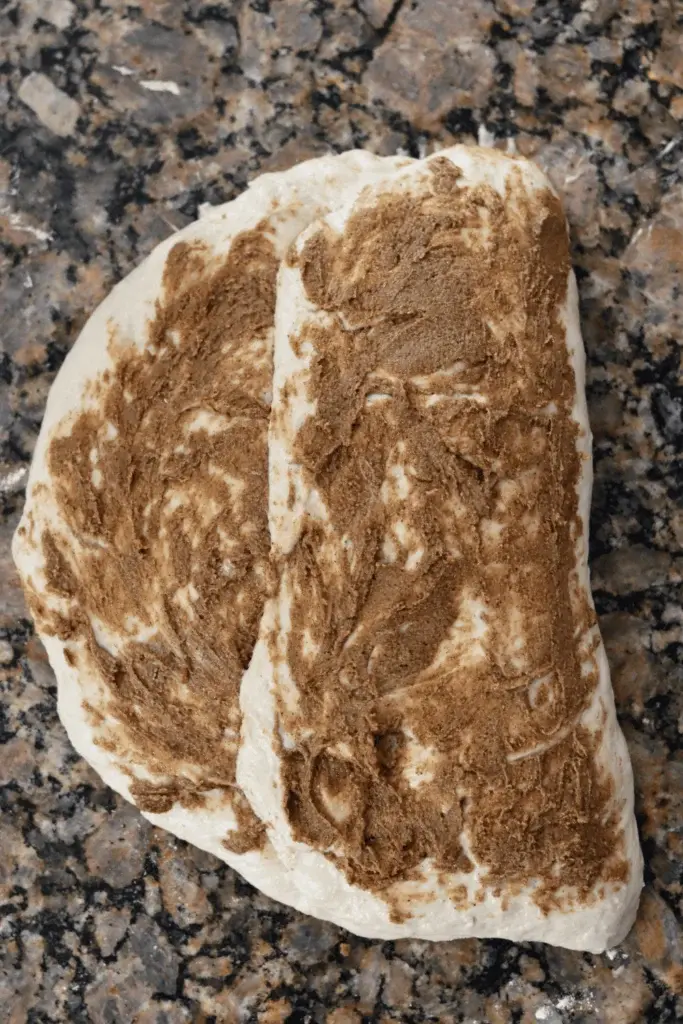
- Next, take the left side of the dough and fold it towards the middle. Spread 1/2 of the remaining chai filling on top of this new section.
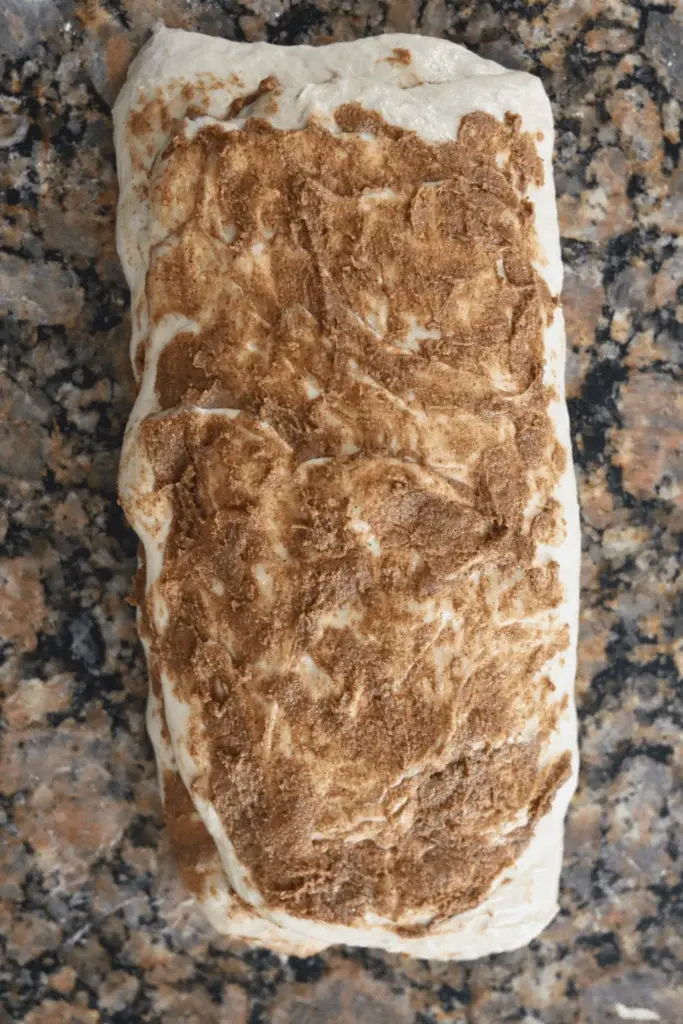
- Finally, take the right side of the dough and fold that towards the middle on top of the last section, like a tri-fold. Spread the remaining chai filling on top. Now, roll up the dough, starting with the part of the dough closest to you.
- Gently cup your hands around the dough ball. Turn the ball in a clockwise motion about a quarter turn and then softly pull the dough towards you. Do this repeatedly until you see the dough form a tighter and more round shape.
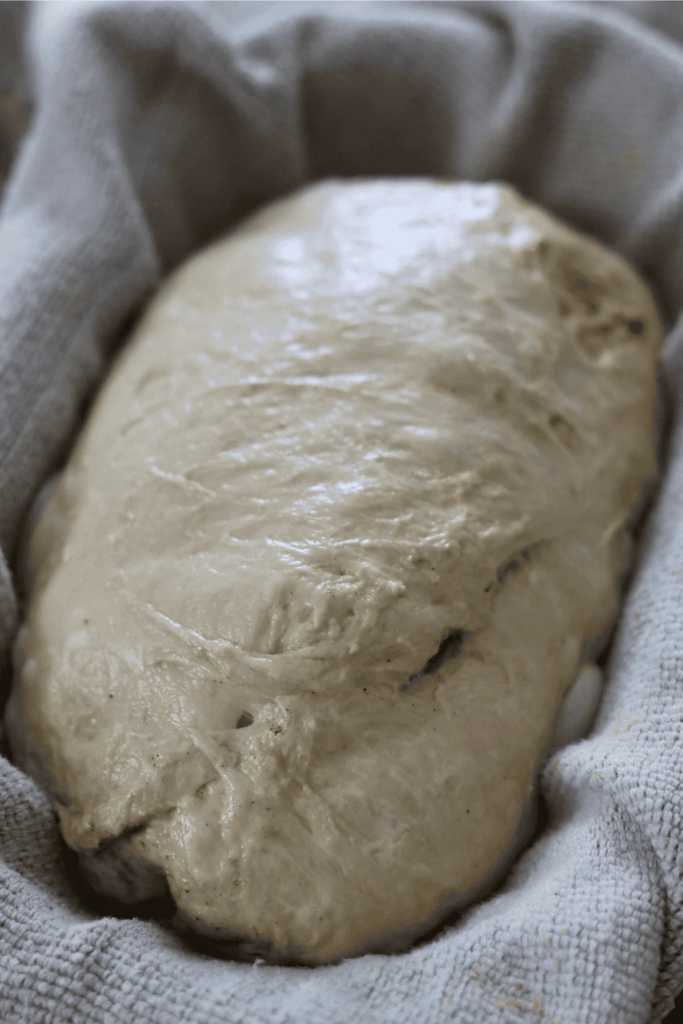
- With a bench scraper or just your hands, carefully scope up the dough and lay it upside down (seed side down) into your floured proofing basket and cover it with a plastic bag or a shower cap.
Cold proof
- Place your proofing basket in the fridge to cold proof for 8-72 hours.
- Placing your dough in the fridge slows down the fermentation process, which deepens the flavors of your loaf. It also gives you flexibility in when you want to bake your bread.
- But don’t wait too long! If left in the fridge for too long, your dough will over-ferment, causing the dough to not be able to rise while baking.
Score
- 30 minutes before baking, place the dough in the freezer. This helps with the scoring design.
- At the same time, place your Dutch oven in your oven and preheat to 500 degrees F. Allow the Dutch oven to preheat for at least 30 minutes.
- Place a piece of parchment paper on your workspace and gently flip the banneton upside down over the parchment paper. Since you dusted the banneton, your dough should slowly release and fall onto the parchment paper, landing in the middle with the floured side facing up.
- With a lame / razor blade or sharp knife, score a crescent moon shape on top of the dough. This is necessary for your bread to be able to expand while baking.
- Grab the corners of the parchment paper and carefully place the Sourdough Chai dough into your preheated Dutch Oven and cover with the lid.
- Lower the temperature to 450 degrees F and bake the Chai Sourdough Bread covered for 30 minutes. Then remove the lid of the Dutch oven and continue to bake the bread for an additional 10-15 minutes with the lid off at 425 degrees F. Keep an eye on the chai filling. If they are browning too much, cover the Dutch oven with aluminum foil while the bread continues to bake.
- Once golden brown, remove the Dutch Oven from your oven.
- Using the corners of the parchment paper, lift the sourdough bread out of the Dutch oven and place it onto a wire rack to cool.
- Allow your homemade bread to cool for at least 1 hour before cutting into it. (I know!! How can you possibly wait when it looks and smells so good?! But trust me, if you cut in too soon, your masterpiece will turn gummy.)
- While the loaf cools, I highly suggest mixing up some whipped chai butter!
Whipped Chai Butter
- Add the softened butter to a bowl of a stand mixer with the whisk attachment. This can also be done with a hand mixer.
- 57g (1/4 c) salted butter
- To the butter, add powdered sugar, cinnamon, ginger, cardamon, nutmeg, cloves, and allspices. Mix on medium/low speed for about 3 minutes, or until the butter is looking light and fluffy.
- 55g (1/4 c) powdered sugar, 3g (1 1/2 tsp) ground cinnamon, 1g (1/2 tsp) ground ginger, .5g (1/4 tsp) ground cardamon, .5g (1/8 tsp) ground nutmeg, .5g (1/8 tsp) cloves, .5g (1/8 tsp) allspice
- Once the hour is up, slice into your work of art, slather on some of the chai butter, and enjoy!
Notes
How to Serve:
This Sourdough Masala Chai Spiced Tea Bread shines in so many delicious ways. Slice it thick (about ¾-inch) and toast until golden for maximum flavor and aroma—the heat intensifies those warming chai spices beautifully. For a simple treat, spread with salted butter that melts into every nook and cranny, or slather on cream cheese for a tangy contrast to the sweet spices. Elevate it further with whipped honey butter infused with a pinch of cardamom, or try mascarpone cheese with a drizzle of maple syrup. This bread is perfect for breakfast alongside your morning coffee or tea, makes an impressive addition to brunch spreads, and works wonderfully as an afternoon snack with a hot cup of chai. The flavors develop beautifully over the first 2-3 days, so don’t hesitate to enjoy it throughout the week. For special occasions, serve it as French toast by soaking thick slices in a cinnamon-spiced egg mixture, or transform it into bread pudding where the chai spices create incredible depth. The possibilities are truly endless with this versatile, aromatic loaf.How to Store:
First 48 Hours (Room Temperature):After your loaf has cooled completely (wait at least 2 hours—this is crucial!), store it cut-side down on a wooden cutting board at room temperature. This method keeps the interior moist while allowing the crust to maintain some texture. For uncut loaves, place in a breathable linen bag or wrap loosely in a clean cotton tea towel for 2-3 days. Days 3-5 (Airtight Storage):
Once sliced, transfer your bread to an airtight plastic bag or bread box to retain moisture and prevent it from drying out. The natural acids in sourdough help keep it fresh for 5-7 days at room temperature—longer than commercial bread. Squeeze out excess air before sealing, and store in a cool, dry spot away from direct sunlight, the stove, or the top of your refrigerator. Never Refrigerate:
This is critical—refrigeration causes bread to go stale faster due to low humidity and cold temperatures. The fridge accelerates moisture loss and ruins texture within 1-2 days. Long-Term Storage (Freezer):
For the best long-term option, freeze your bread. Slice the completely cooled loaf, place parchment paper between slices to prevent sticking, and store in a freezer-safe bag with all air removed. Frozen sourdough stays fresh for up to 3 months. To enjoy, simply pop frozen slices directly into the toaster—no thawing needed. For whole loaves, wrap tightly in plastic wrap and aluminum foil before freezing. Revival Method:
Bread starting to dry out? Lightly spray the exterior with water and reheat at 300°F (150°C) for 25-30 minutes to bring it back to life with a crispy crust and soft interior.