Soft Whole Wheat Sourdough Sandwich Bread Recipe
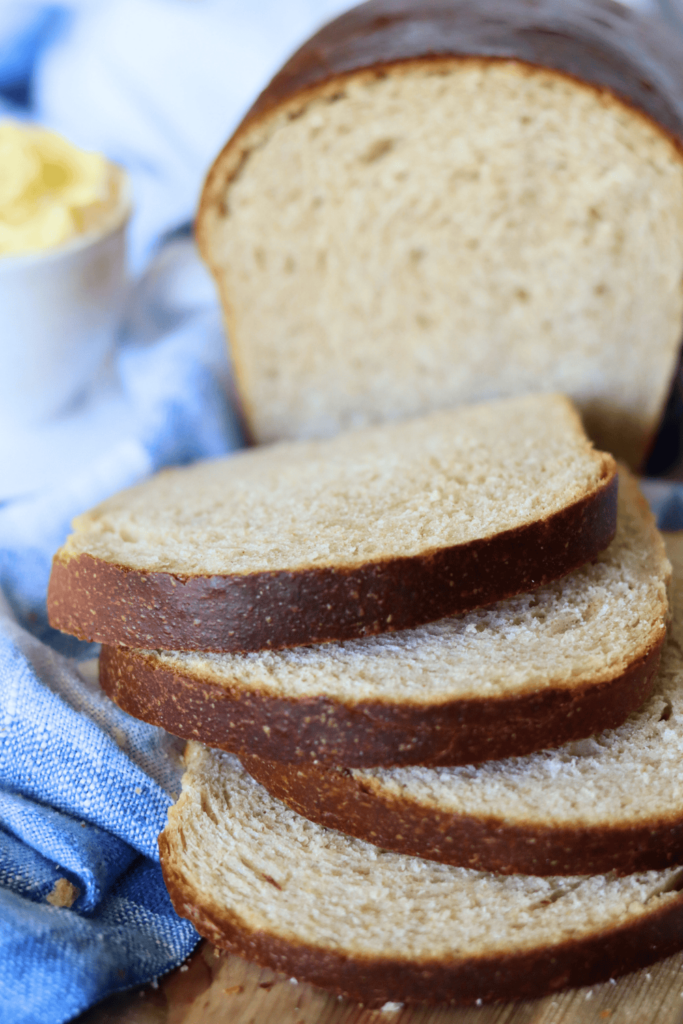
This soft whole wheat sourdough sandwich bread recipe will transform your homemade baking game. If you’ve been searching for perfectly tender, fluffy sandwich bread with that signature sourdough tang and the wholesome goodness of whole wheat, you’re in the right place. This recipe delivers a soft crumb that’s ideal for sandwiches, toast, or simply slathering with butter. Whether you’re a sourdough beginner or an experienced baker, you’ll find clear, step-by-step instructions to create bakery-quality loaves in your own kitchen. Let’s dive into making the most delicious whole wheat sourdough sandwich bread you’ve ever tasted!

Ingredients & Substitutions
* To find precise measurements, scroll to the bottom of this post to find the recipe card*

Active sourdough starter: Use an active and bubbly starter at its peak.
Milk: I used whole milk, but you can substitute this with your favorite dairy or non dairy option. Keep the temperature no higher than 120°F, as anything hotter can kill the starter.
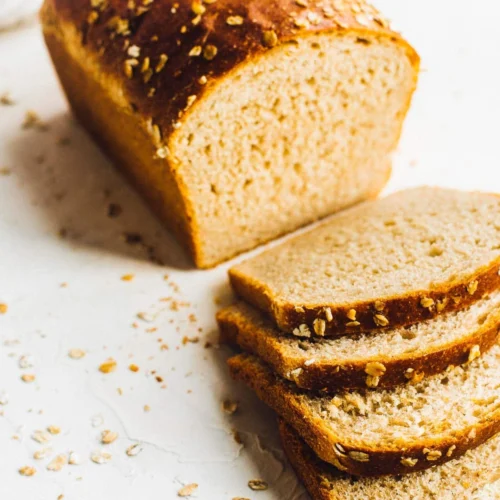
Honey: For some sweetness and color! While the bread bakes, the crust will turn golden brown due to the Maillard reaction.
Melted butter: Adding butter to this recipe makes this everyday bread so soft. You can substitute for a 1:1 ratio with olive oil or a non-dairy butter, if preferred.
Bread flour: This recipe can be made with all-purpose flour, but I highly suggest using bread flour. Bread flour has a higher protein content than all-purpose flour, which helps you bake a taller, fluffier, and softer sourdough sandwich loaf.
Whole wheat: I love the King Arthur brand. Their whole wheat flour added a delicious flavor to this sourdough sandwich loaf.
Salt: Any unrefined salt will do!

Supplies
Large Mixing Bowl
Danish Dough Whisk
Bowl Cover
Rolling pin
8.5 x 4.5 loaf pan
Baker’s Schedule:
This guideline is for environments that are 70 degrees F. Hotter kitchens will require less time, while cool temps will take longer.
Bake the Same Day:
9 am: Make the Dough
10 am: Knead the Dough
10 am: First Rise
7 pm: Shape
7 pm: Second Rise
9 pm: Bake
Bake the Next Day:
9 pm: Make the Dough
10 pm: Knead the Dough
10 pm: First Rise
Next Morning:
7 am: Shape
7 am: Second Rise
9 am: Bake
How to Make Whole Wheat Sourdough Bread
Feed Your Starter
Feed 25g of starter, 75g of warm water, and 75g of flour. Mix until the flour is completely incorporated and leave to rise. Allow your starter to rise and reach its peak. Let the bulk rise to least double in size, with bubbles on top of the dough and all throughout (the top of the starter will look like little craters) before using.
In my 70 degree kitchen, this takes about 12 hours. If your kitchen is warmer, it will take less time. The opposite is true if your kitchen is cooler. Adjust the timing based on your kitchen environment.
Once your starter is ready, prepare to make the dough.
Make the Dough
In a large bowl, whisk together the starter, warm milk, melted butter, and honey. Then, add flours and salt to the wet ingredients and mix with a Danish dough whisk until all the flour is fully incorporated.
I also use a bowl scraper to clean the sides of the bowl and mix all the ingredients together. The dough will be sticky.
Cover the bowl with a cover and let the dough rest for 30 minutes.
Knead the Dough
After 30 minutes, wet your fingers to prevent the dough from sticking.
Take a piece of the wet dough, pull it upwards, and fold it towards the center. Push the heel of your hand into the dough.
Turn the bowl a quarter turn clockwise and repeat the same motion. Continue kneading the dough for about 20 seconds. It should become stiffer and smoother. Stop if the dough starts to tear.
Grease another bowl with butter and place the dough in it, seam side down.
Bulk Fermentation
Cover the bowl again and let the dough rise until it has doubled in size. In my 70°F kitchen, the first rise took 10-12 hours. Remember, bulk fermentation begins once the ingredients are mixed, not after you’ve kneaded.
Shape the Dough
Once the dough has doubled in size, remove the bowl cover and punch the dough. Do so by placing your fist in the center of the dough and pushing it downwards. Continue to punch the edges of the dough to remove all the air bubbles.
Punching the dough helps to create a tighter, more uniform crumb, which is what you want for sandwich bread.
Remove the dough onto a work surface—no flour needed. Stretch or roll the dough into a large rectangle, about 9 inches x 13 inches (it doesn’t have to be exact). Roll the dough into a log, similar to how you would with a cinnamon roll. Tuck the ends of the log under and pinch the seams together.
If you have made sourdough sandwich bread before, you will notice that the dough feels more dense and stiff due to the whole wheat flour.

Second Rise
Using a bench scraper or your hands, gently lift the sourdough dough and place it into a greased 8.5 x 4.5-inch loaf pan with the seam side down. Cover the dough and let it rise until it is 1 inch above the rim of the pan.
In my 70 degree kitchen, the second and final rise took 1-2 hours. It is tempting to rush this step, but don’t! If your loaf has not risen properly, it will be dense and gummy or bust while baking.
Bake
Preheat your oven to 375°F.
Place the pan in the hot oven on the middle rack and bake for 30-35 minutes. By now, the top of the loaf should be a beautifully dark, golden brown color. To prevent the top from burning, cover the top with a piece of aluminum foil and continue to bake for 20-25 more minutes for a total of 50-55 minutes.
The internal temperature of a properly baked loaf should be 201°F.
To prevent the sourdough sandwich bread crust from tearing, I like to place a cast iron skillet or baking sheet on the oven rack below the bread with a cup of ice cubes. This creates extra steam in the oven while the bread bakes, which keeps the surface of the dough soft allowing the bread to expand and rise without tearing.
Remove from the oven and place the bread pan on a wire rack. Keep the pan loaf in the tin pan for an extra 5 minutes before removing it to cool.
While the Sourdough Whole Wheat Sandwich Bread is still warm, spread butter all over the top of the bread for a super soft crust.
Cool for at least 1 hour before slicing.
How to serve sourdough sandwich bread:
This soft whole wheat sourdough sandwich bread is incredibly versatile and perfect for everyday enjoyment. Here are the best ways to serve it:
- Classic Sandwiches – Use for your favorite lunch combinations like turkey and avocado, BLTs, or grilled cheese
- Toast – Slice and toast until golden, then top with butter, jam, avocado, or nut butter for a satisfying breakfast
- French Toast – The soft texture makes exceptional French toast that soaks up custard beautifully
- Bread and Butter – Serve thick slices alongside soups, stews, or pasta dishes
- Panini or Grilled Sandwiches – The sturdy yet soft texture holds up perfectly when pressed or grilled
- Open-Faced Toasts – Top with ricotta and honey, smashed chickpeas, or cream cheese and cucumber
Pro Tip: Let the bread cool completely before slicing for the cleanest cuts and best texture.
How to store sourdough sandwich bread:
Proper storage keeps your homemade sourdough sandwich bread soft and fresh for days.
Room Temperature (Recommended for 3-4 days)
- Allow bread to cool completely before storing
- Wrap tightly in plastic wrap or place in an airtight container or zip-top bag
- Store in a cool, dry place away from direct sunlight
- Avoid refrigerating, as this actually speeds up staling
Freezing (Up to 3 months)
- Slice the entire loaf before freezing for easy single-serve portions
- Wrap the whole loaf (or slices) tightly in plastic wrap, then in aluminum foil or a freezer bag
- Label with the date
- Toast frozen slices directly from the freezer, or thaw at room temperature for 15-20 minutes
Refreshing Day-Old Bread
- Lightly toast slices to restore texture
- For the whole loaf, wrap in foil and warm in a 300°F oven for 10-15 minutes
Storage Note: Homemade bread without preservatives typically stays fresh for 3-4 days at room temperature, which is perfectly normal for artisan-style loaves.

For More Guidance:
Why You’ll Love This Recipe
This soft whole wheat sourdough sandwich bread recipe checks all the boxes for busy bakers who want homemade goodness without the fuss.
Soft and Nourishing
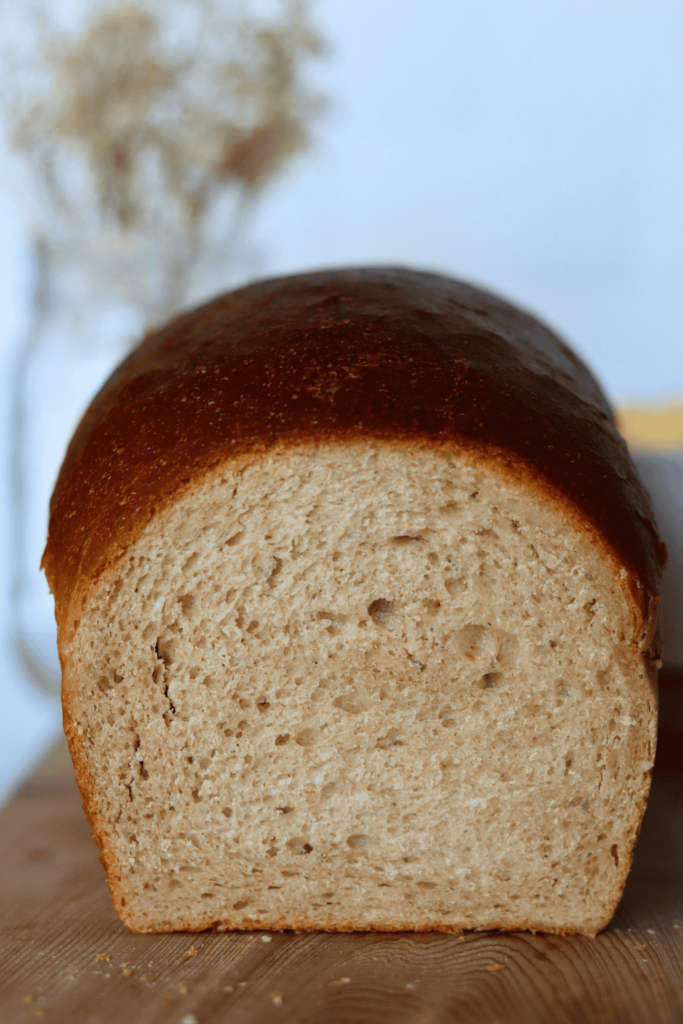
Forget everything you know about dense, dry whole wheat bread. This recipe delivers an incredibly soft, pillowy crumb that rivals store-bought white sandwich bread, but with all the nutritional benefits of whole grains. The sourdough fermentation breaks down the wheat, making it easier to digest while adding that signature tangy flavor. You get wholesome nutrition in every slice without sacrificing the tender texture that makes perfect sandwiches and toast. It’s proof that healthy bread doesn’t have to be heavy or bland.
Minimal Kneading
Say goodbye to exhausting arm workouts! This recipe uses a gentle stretch-and-fold technique instead of traditional kneading, making it accessible even for beginners. You’ll spend just a few minutes working with the dough at intervals, letting time and fermentation do most of the heavy lifting. No stand mixer required—just your hands and a bowl. The minimal kneading approach not only saves effort but also develops better gluten structure naturally, resulting in that coveted soft texture with minimal work.
Made and Baked in One Day
Unlike many sourdough recipes that require days of planning, this bread goes from starter to sliced loaf in about 8-10 hours. Mix it in the morning, let it rise during the day, and enjoy fresh-baked bread by dinner. No overnight bulk fermentation or complicated schedules—this is sourdough that fits into your actual life. Perfect for when you want homemade bread without the multi-day commitment, giving you all the flavor and benefits of traditional sourdough in a single, manageable day.
Frequently Asked Questions
Can I use all-purpose flour instead of whole wheat flour?
Yes! You can substitute all-purpose or bread flour for part or all of the whole wheat. For best results, try a 50/50 blend of whole wheat and all-purpose flour. If using 100% white flour, reduce the water by about 10-15% since whole wheat absorbs more liquid.
Why is my whole wheat sourdough bread dense?
Dense bread usually means under-fermentation or inactive starter. Make sure your sourdough starter is bubbly and active before using. Also, give the dough enough time to rise—it should nearly double in size during bulk fermentation and again during the final proof.
How long does homemade sourdough sandwich bread last?
Properly stored in an airtight container or bag at room temperature, this bread stays fresh for 3-4 days. For longer storage, slice and freeze for up to 3 months. Toast slices directly from frozen, or thaw at room temperature for 15-20 minutes.
Happy baking!
Soft Whole Wheat Sourdough Sandwich Bread Recipe
Ingredients
- 150 g 3/4 cup active sourdough starter
- 300 g 1 1/4 cups warm milk
- 40 g 2 Tablespoons honey
- 57 g 4 Tablespoons unsalted butter, melted
- 125 g 1 cup whole wheat flour
- 375 g 2 2/3 cups bread flour
- 9 g 1 1/2 teaspoons salt
Instructions
- Find Two Sample Baker’s Schedules Below
- Feed Your Starter
- 1. Feed 25g of starter, 75g of warm water, and 75g of flour. Mix until the flour is completely incorporated and leave to rise. Allow your starter to rise and reach its peak. Let the bulk rise to least double in size, with bubbles on top of the dough and all throughout (the top of the starter will look like little craters) before using.
- In my 70 degree kitchen, this takes about 12 hours. If your kitchen is warmer, it will take less time. The opposite is true if your kitchen is cooler. Adjust the timing based on your kitchen environment.
- 2. Once your starter is ready, prepare to make the dough.
Make the Dough
- 3. In a large bowl, whisk together the starter, warm milk, melted butter, and honey. Then, add flours and salt to the wet ingredients and mix with a Danish dough whisk until all the flour is fully incorporated.
- 150g starter, 300g milk, 57g butter, 40g honey, 125g whole wheat flour, 375g bread flour, 9g salt
- 4. I also use a bowl scraper to clean the sides of the bowl and mix all the ingredients together. The dough will be sticky.
- 5. Cover the bowl with a cover and let the dough rest for 30 minutes.
Knead the Dough
- 6. After 30 minutes, wet your fingers to prevent the dough from sticking.
- 7. Take a piece of the wet dough, pull it upwards, and fold it towards the center. Push the heel of your hand into the dough.
- 8. Turn the bowl a quarter turn clockwise and repeat the same motion. Continue kneading the dough for about 20 seconds. It should become stiffer and smoother. Stop if the dough starts to tear.
- 9. Grease another bowl with butter and place the dough in it, seam side down.
Bulk Fermentation
- 10. Cover the bowl again and let the dough rise until it has doubled in size. In my 70°F kitchen, the first rise took 10-12 hours. Remember, bulk fermentation begins once the ingredients are mixed, not after you’ve kneaded.
Shape the Dough
- 11. Once the dough has doubled in size, remove the bowl cover and punch the dough. Do so by placing your fist in the center of the dough and pushing it downwards. Continue to punch the edges of the dough to remove all the air bubbles.
- 12. Punching the dough helps to create a tighter, more uniform crumb, which is what you want for sandwich bread.
- 13. Remove the dough onto a work surface—no flour needed. Stretch or roll the dough into a large rectangle, about 9 inches x 13 inches (it doesn’t have to be exact). Roll the dough into a log, similar to how you would with a cinnamon roll. Tuck the ends of the log under and pinch the seams together.
- If you have made sourdough sandwich bread before, you will notice that the dough feels more dense and stiff due to the whole wheat flour.
Second Rise
- 14. Using a bench scraper or your hands, gently lift the sourdough dough and place it into a greased 8.5 x 4.5-inch loaf pan with the seam side down. Cover the dough and let it rise until it is 1 inch above the rim of the pan.
- 15. In my 70 degree kitchen, the second and final rise took 1-2 hours. It is tempting to rush this step, but don’t! If your loaf has not risen properly, it will be dense and gummy or bust while baking.
Bake
- 16. Preheat your oven to 375°F.
- 17. Place the pan in the hot oven on the middle rack and bake for 30-35 minutes. By now, the top of the loaf should be a beautifully dark, golden brown color. To prevent the top from burning, cover the top with a piece of aluminum foil and continue to bake for 20-25 more minutes for a total of 50-55 minutes.
- 18. The internal temperature of a properly baked loaf should be 201°F.
- 19. To prevent the sourdough sandwich bread crust from tearing, I like to place a cast iron skillet or baking sheet on the oven rack below the bread with a cup of ice cubes. This creates extra steam in the oven while the bread bakes, which keeps the surface of the dough soft allowing the bread to expand and rise without tearing.
- 20. Remove from the oven and place the bread pan on a wire rack. Keep the pan loaf in the tin pan for an extra 5 minutes before removing it to cool.
- 21. While the Sourdough Whole Wheat Sandwich Bread is still warm, spread butter all over the top of the bread for a super soft crust.
- 22. Cool for at least 1 hour before slicing.
Notes
This soft whole wheat sourdough sandwich bread is incredibly versatile and perfect for everyday enjoyment. Here are the best ways to serve it: Classic Sandwiches – Use for your favorite lunch combinations like turkey and avocado, BLTs, or grilled cheese
Toast – Slice and toast until golden, then top with butter, jam, avocado, or nut butter for a satisfying breakfast
French Toast – The soft texture makes exceptional French toast that soaks up custard beautifully
Bread and Butter – Serve thick slices alongside soups, stews, or pasta dishes
Panini or Grilled Sandwiches – The sturdy yet soft texture holds up perfectly when pressed or grilled
Open-Faced Toasts – Top with ricotta and honey, smashed chickpeas, or cream cheese and cucumber Pro Tip: Let the bread cool completely before slicing for the cleanest cuts and best texture. How to Store
Proper storage keeps your homemade sourdough sandwich bread soft and fresh for days.
Room Temperature (Recommended for 3-4 days) Allow bread to cool completely before storing
Wrap tightly in plastic wrap or place in an airtight container or zip-top bag
Store in a cool, dry place away from direct sunlight
Avoid refrigerating, as this actually speeds up staling Freezing (Up to 3 months) Slice the entire loaf before freezing for easy single-serve portions
Wrap the whole loaf (or slices) tightly in plastic wrap, then in aluminum foil or a freezer bag
Label with the date
Toast frozen slices directly from the freezer, or thaw at room temperature for 15-20 minutes Refreshing Day-Old Bread Lightly toast slices to restore texture
For the whole loaf, wrap in foil and warm in a 300°F oven for 10-15 minutes Storage Note: Homemade bread without preservatives typically stays fresh for 3-4 days at room temperature, which is perfectly normal for artisan-style loaves.