Sourdough Starter Recipe: Easy Beginner’s Guide
Making sourdough starter from scratch transforms simple ingredients into a living culture that creates bakery-quality bread at home. This guide covers everything from understanding wild yeast fermentation to troubleshooting common problems. Readers will learn the step-by-step process of creating their own sourdough starter recipe, maintaining it long-term, and exploring delicious variations. Whether starting with a kit or building from flour and water, this comprehensive resource provides all the knowledge needed for sourdough success.
What is Sourdough Starter?
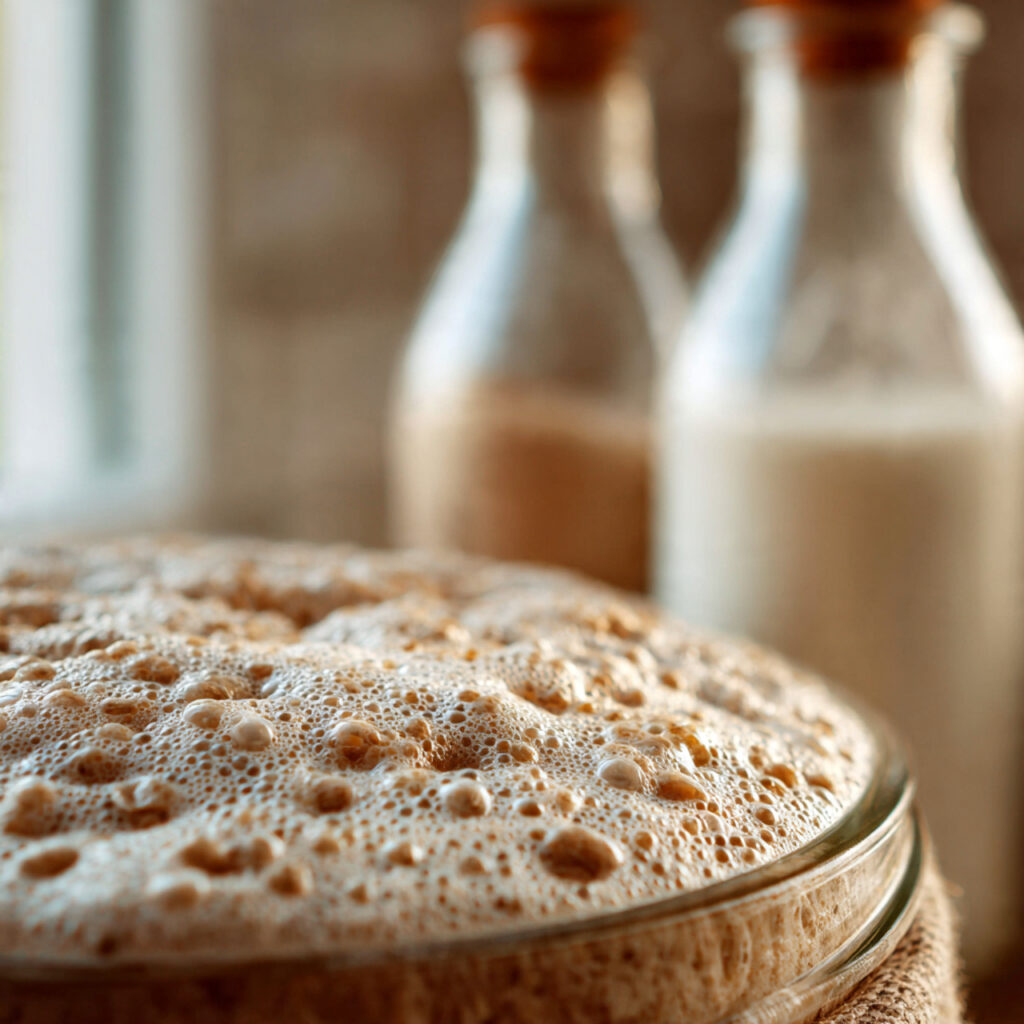
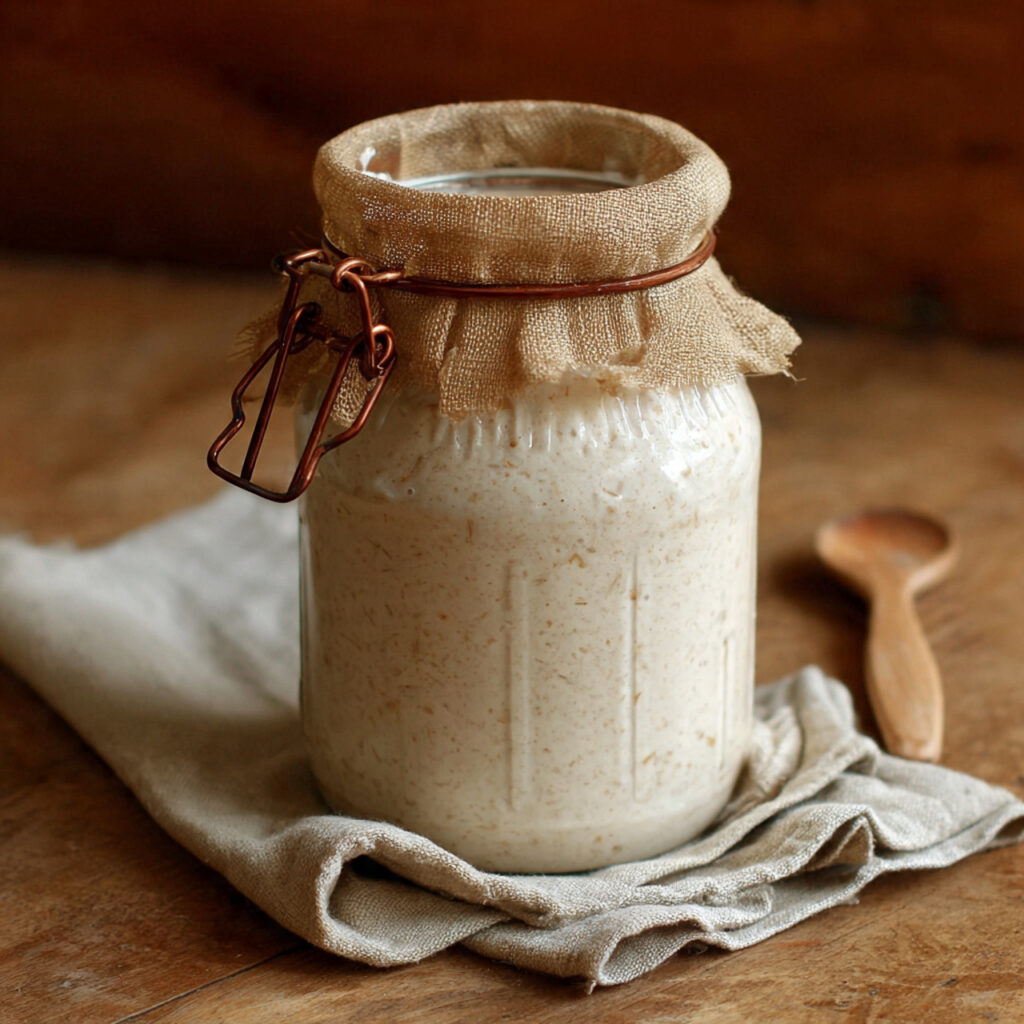
A sourdough starter is a living culture of wild yeast and beneficial bacteria that naturally occur in flour and the surrounding environment. Unlike commercial yeast, this culture develops over several days, creating a complex ecosystem that gives sourdough bread its characteristic tangy flavor and chewy texture. The starter acts as a natural leavening agent, eliminating the need for store-bought yeast.
When flour and water combine, they create the perfect environment for wild yeast and lactobacilli bacteria to flourish. These microorganisms feed on the carbohydrates in flour, producing carbon dioxide bubbles that make bread rise and organic acids that contribute to sourdough’s distinctive taste.
Understanding Wild Yeast and Fermentation
Wild yeast exists everywhere in the air, on grain surfaces, and even on our hands. When given the right conditions of moisture, food, and warmth, these yeasts activate and multiply. The fermentation process begins almost immediately after mixing flour with water.
During fermentation, yeast cells consume sugars and starches, producing carbon dioxide gas and ethanol as byproducts. The bacteria in the culture produce lactic and acetic acids, which give sourdough its signature sour flavor. This symbiotic relationship between yeast and bacteria creates a stable, self-sustaining culture that can last for generations with proper care.
The fermentation timeline typically spans five to seven days for a new starter to become fully active. Temperature plays a crucial role warmer environments (around 75-80°F) speed up fermentation, while cooler temperatures slow it down.
Benefits of Homemade Sourdough Starter
Creating a starter from scratch offers numerous advantages beyond just baking bread. The fermentation process breaks down gluten and phytic acid in flour, making the final bread easier to digest for many people. The natural acids also help preserve bread, extending its shelf life without artificial preservatives.
Homemade starters cost virtually nothing to maintain just flour and water. They also provide flexibility in baking schedules and allow bakers to experiment with different flour types and flavor profiles. Many bakers find the process of nurturing a living culture deeply satisfying and meditative.
The probiotic benefits of naturally fermented bread have gained attention in recent years. While the high baking temperatures kill most bacteria, the fermentation process still produces beneficial compounds that support gut health.
How to Make Sourdough Starter (Step-by-Step Recipe)
Creating a sourdough starter requires patience and consistency, but the process itself is remarkably simple. With just two ingredients and a few minutes each day, anyone can cultivate a robust culture ready for baking.
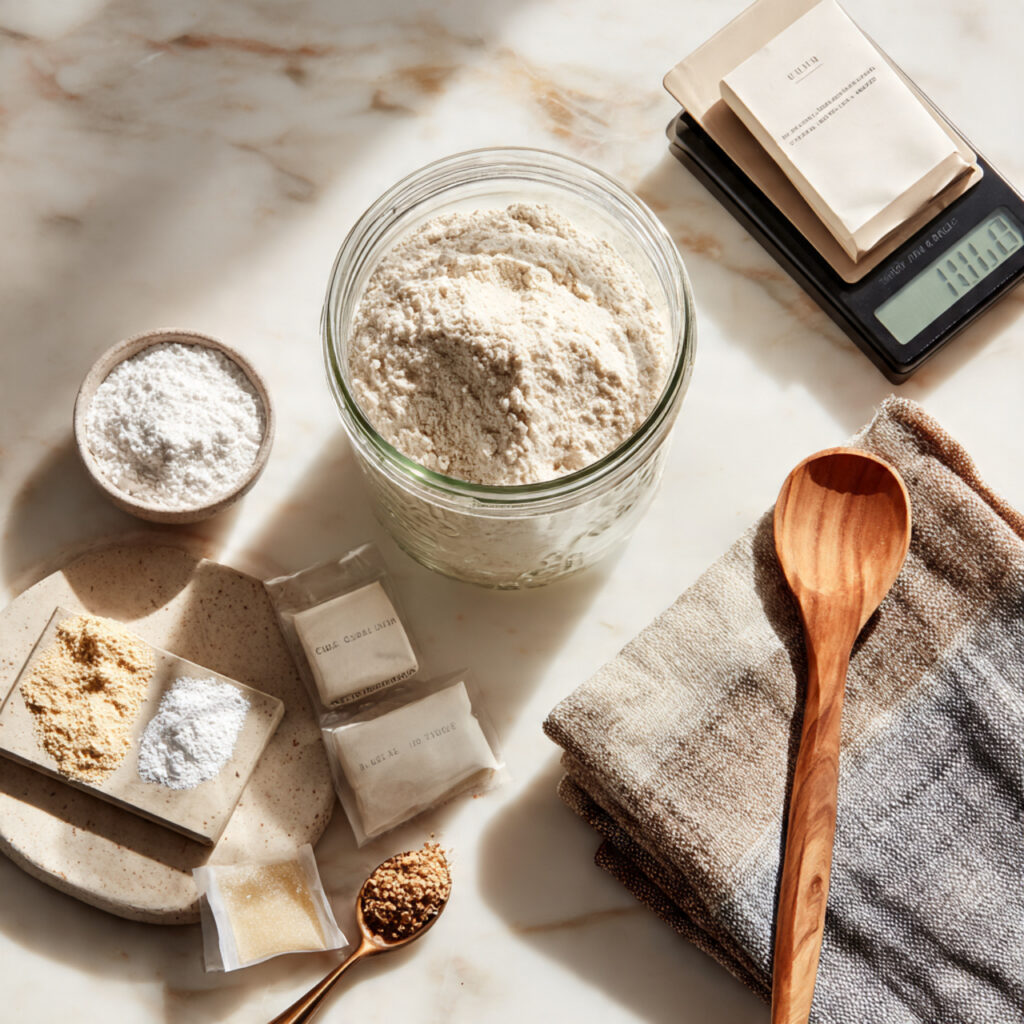
Ingredients Needed for Sourdough Starter
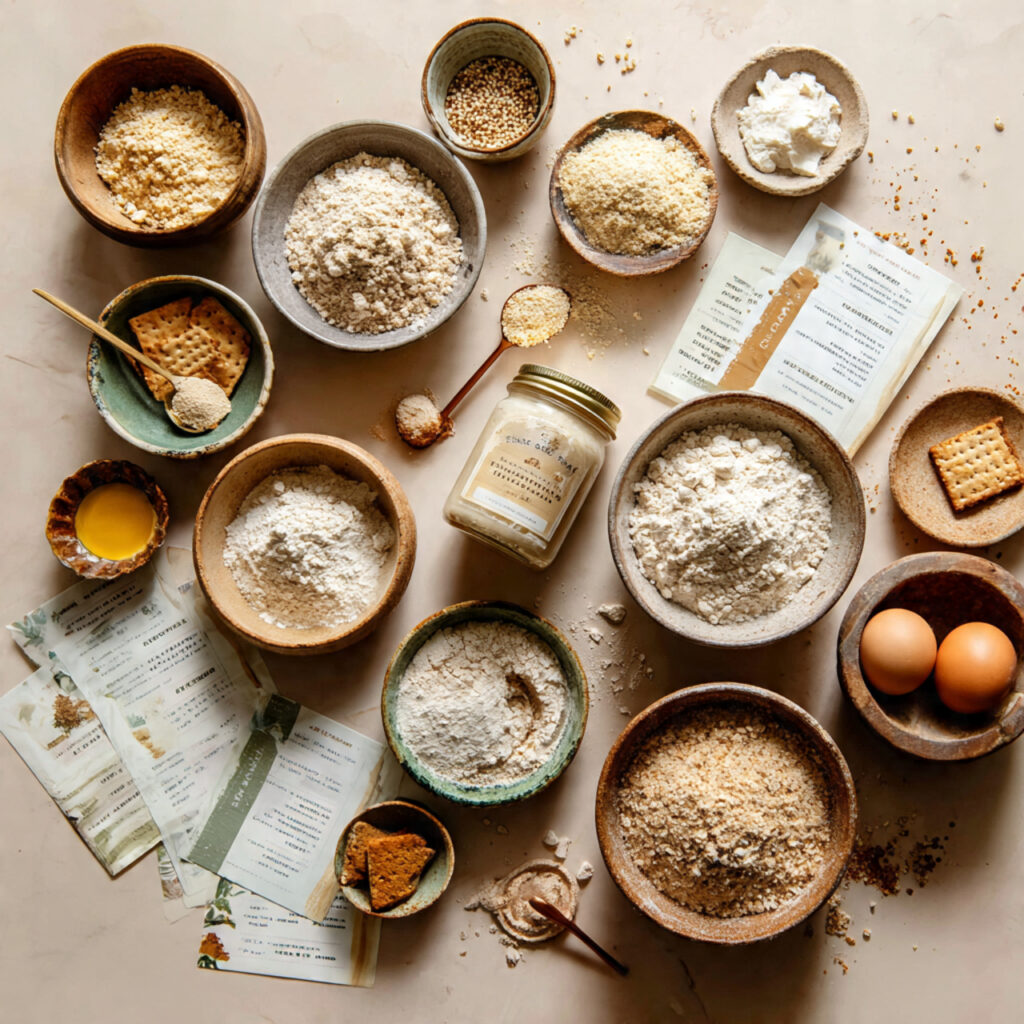
The beauty of sourdough lies in its simplicity. Here’s everything needed:
- All-purpose flour or whole wheat flour: 4-5 cups total over the week
- Water: Filtered or dechlorinated, room temperature, 4-5 cups total
- Glass jar or container: Wide-mouth quart-size jar works best
- Kitchen scale (optional but recommended): For precise measurements
- Wooden spoon or spatula: For mixing
Whole wheat flour often produces faster results because it contains more nutrients and wild yeast than white flour. However, all-purpose flour works perfectly well and creates a milder flavor. Some bakers start with whole wheat and transition to all-purpose once the culture is established.
Water quality matters more than many realize. Chlorinated tap water can inhibit yeast growth, so letting tap water sit out overnight or using filtered water ensures the best results.
Day-by-Day Feeding Schedule
Day 1: Mix 1/2 cup flour with 1/4 cup water in a clean jar. Stir until no dry flour remains. The consistency should resemble thick pancake batter. Cover loosely with a cloth or lid (don’t seal tightly the culture needs oxygen). Leave at room temperature in a draft-free spot.
Day 2: The mixture may not show much activity yet. This is completely normal. No feeding required today just check on it and give it a stir.
Day 3: Small bubbles might start appearing. Discard half the mixture (or about 1/2 cup) and feed with 1/2 cup fresh flour and 1/4 cup water. Stir well and cover loosely again.
Day 4: More bubbles should be visible, and the mixture may have a slightly sour smell. Repeat the discard and feeding process from Day 3.
Day 5: The starter should be noticeably more active, with bubbles throughout and possible volume increase. Continue daily discarding and feeding.
Day 6: Activity should be strong now. The starter might double in size between feedings. Maintain the daily feeding schedule.
Day 7: The starter should be ready if it consistently doubles within 4-6 hours after feeding and shows plenty of bubbles.
Consistency is key throughout this process. Feeding at roughly the same time each day helps establish a predictable rhythm. Room temperature affects timing warmer kitchens may see faster development.
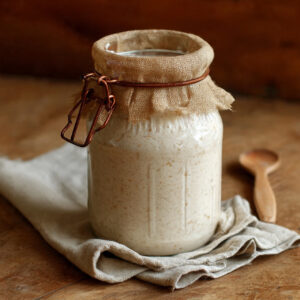
Signs Your Starter is Ready to Use
A mature, active starter displays several telltale characteristics. It should double in volume within 4-6 hours of feeding, creating a domed top with a network of bubbles throughout. The texture becomes light and airy, almost mousse-like.
The “float test” provides a reliable readiness check. Drop a small spoonful of starter into a glass of water if it floats, it’s ready to bake with. Sinking indicates it needs more time or more frequent feedings.
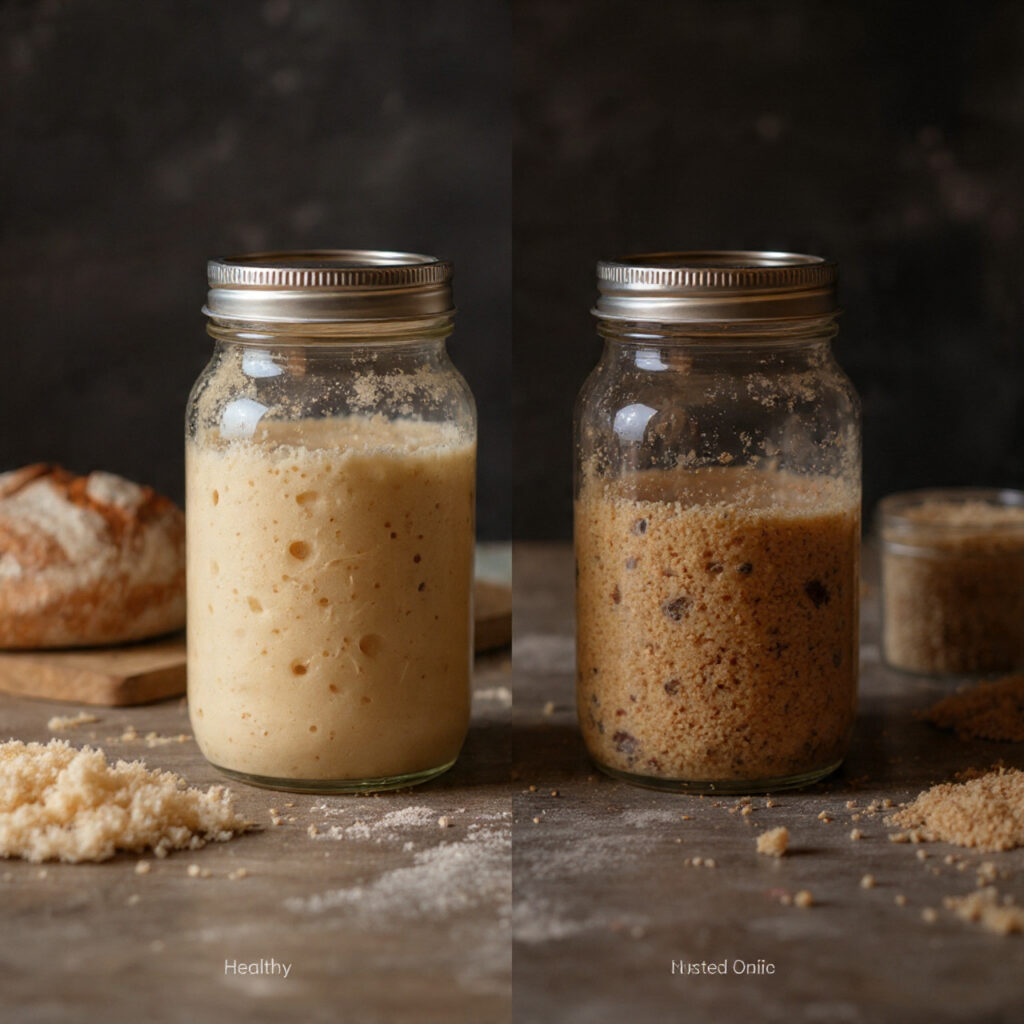
A pleasant, tangy aroma similar to yogurt or beer signals healthy fermentation. Overly sharp or acetone-like smells suggest the starter is hungry and needs feeding. The mixture should have a slightly sweet-sour smell that’s appealing, not off-putting.
Visual cues matter too. A healthy starter shows distinct layers with clear liquid (called “hooch”) occasionally forming on top. This dark liquid is harmless just stir it back in before feeding or pour it off if a milder flavor is preferred.
Sourdough Bread Starter Recipe and Variations
Once a starter reaches maturity, the real fun begins. Different flour types create unique flavors and textures in the final bread, opening up endless possibilities for experimentation.
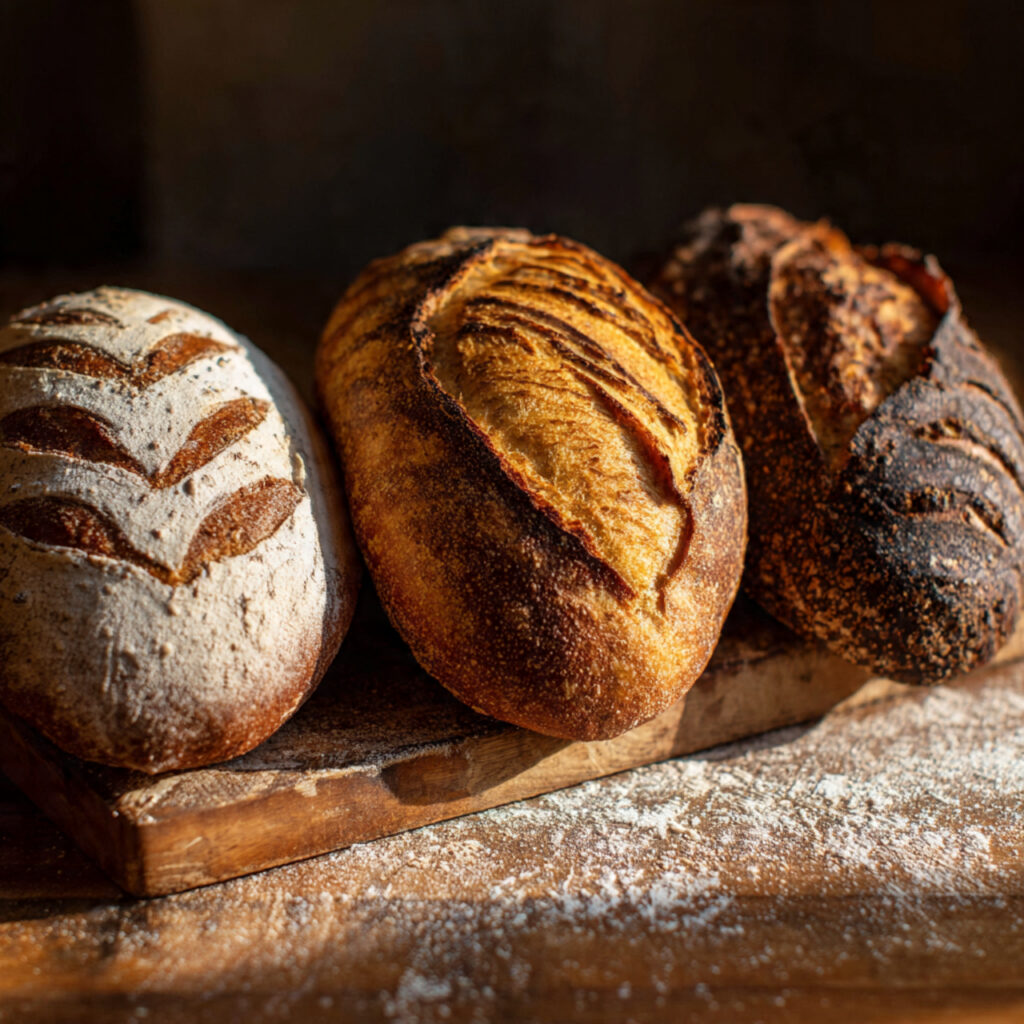
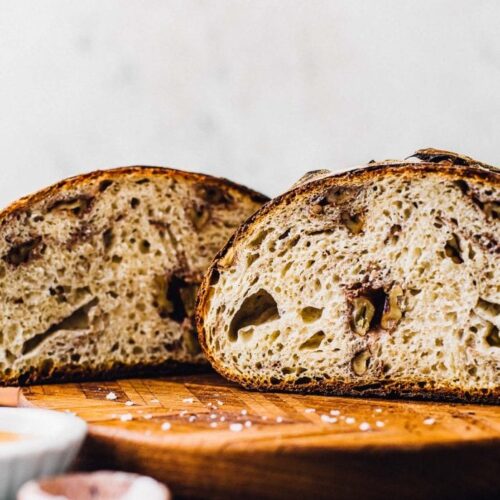
Classic Sourdough Bread Recipe
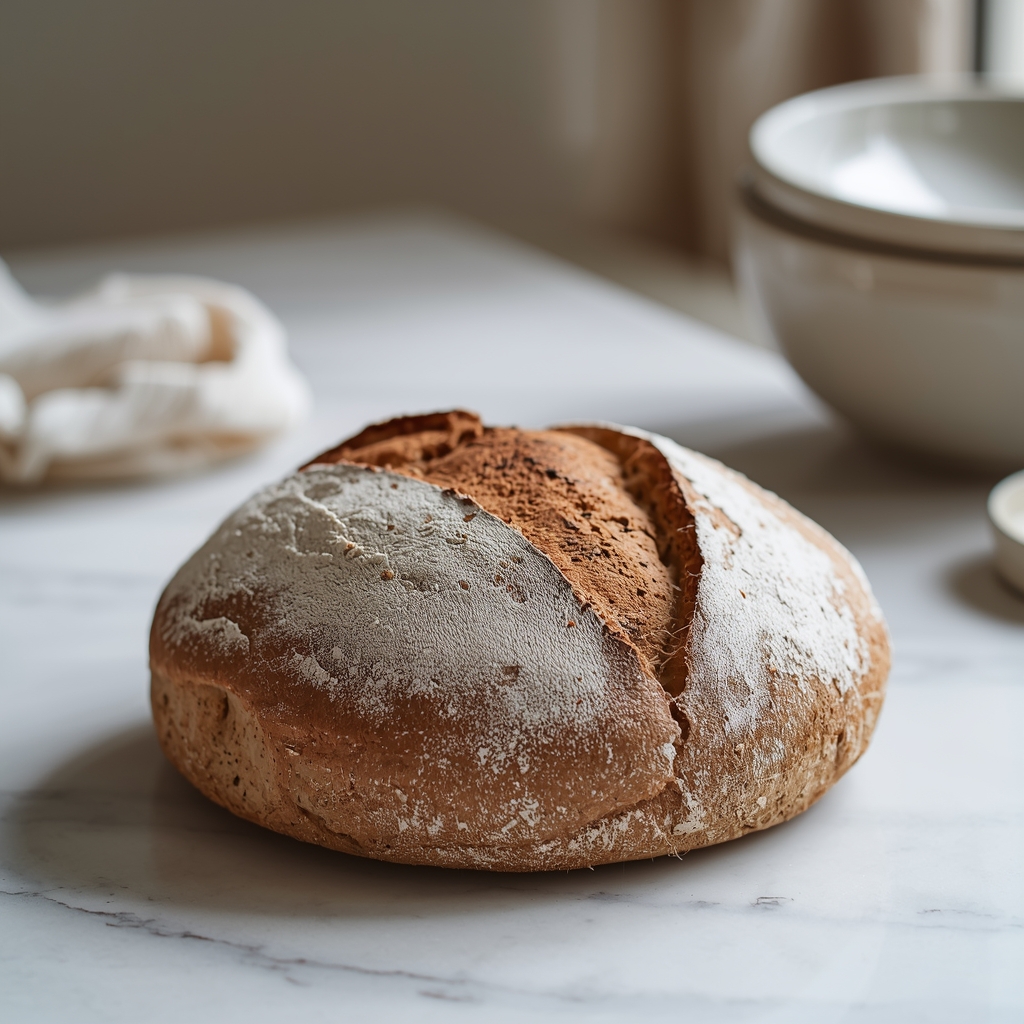
A basic sourdough loaf showcases the starter’s capabilities beautifully. This recipe yields one rustic boule with a crispy crust and open crumb structure.
Ingredients:
- 500g bread flour
- 350g water
- 100g active starter (fed 4-6 hours prior)
- 10g salt
Method: Mix flour and water, let rest for 30 minutes (autolyse). Add starter and salt, then perform stretch-and-fold techniques every 30 minutes for 3 hours. Shape, proof overnight in the refrigerator, then bake in a preheated Dutch oven at 450°F for 30 minutes covered, 15 minutes uncovered.
The overnight cold fermentation develops deeper flavors while making the dough easier to handle. This technique has become popular among home bakers for producing bakery-quality results.
For those new to sourdough baking, try incorporating the starter into other recipes like sourdough apple cinnamon scones or sourdough sugar cookies to gain confidence before tackling a full loaf.
Whole Wheat Sourdough Starter Recipe
Converting a white flour starter to whole wheat creates a nuttier, more robust flavor profile. Whole wheat contains the entire wheat kernel, including the bran and germ, which adds nutritional value and complexity.
To create a whole wheat starter, simply begin feeding the existing culture with whole wheat flour instead of all-purpose. After three to four feedings, the culture will fully adapt. Whole wheat flour absorbs more water, so adjustments to hydration ratios may be necessary typically requiring 10-15% more water than white flour starters.
A 100% whole wheat sourdough bread recipe follows similar principles to the classic version but benefits from a slightly wetter dough and longer fermentation time. The denser nature of whole wheat means the crumb will be tighter, but the flavor becomes earthier and more satisfying.
Rye Sourdough Starter Alternative
Rye flour produces one of the most vigorous starters available. The high enzyme content in rye accelerates fermentation, creating an especially active culture. Bakers working in cool climates often prefer rye starters for their reliability.
Starting a rye culture follows the same process as all-purpose, but activity appears more quickly often within three to four days instead of seven. Rye starters tend to be stickier and more elastic than wheat-based versions.
Traditional European breads like pumpernickel rely heavily on rye starters. The distinctive sour flavor pairs perfectly with hearty ingredients. Rye bread requires different handling techniques due to lower gluten content, but the results are wonderfully dense and flavorful.
Best Sourdough Starter Kit Options
For those who prefer a shortcut or want guaranteed results, sourdough starter kits provide everything needed in one package. These kits have grown increasingly popular as home baking has surged.
What to Look for in a Sourdough Starter Kit
A quality kit should include several essential components. First and foremost, it needs either dehydrated starter culture or detailed instructions for creating one from scratch. The best kits provide both options.
Look for kits that include a proper container ideally a wide-mouth glass jar with measurement markings. This eliminates guesswork during feeding. Some premium kits include a kitchen scale, which dramatically improves consistency.
Comprehensive instructions make the difference between success and frustration. Quality kits provide troubleshooting guides, feeding schedules, and even basic bread recipes. Video tutorials or online support communities add significant value.
Additional tools that enhance the experience include a dough scraper, banneton basket for proofing, and a lame for scoring. While not essential for maintaining a starter, these items prove invaluable when baking bread.
Top Sourdough Bread Starter Kits for Beginners
Several reputable companies offer excellent starter kits. The “Cultures for Health” kit provides organic dried starter culture with detailed instructions and access to online resources. Their culture dates back decades and produces reliably tangy bread.
Another popular option is the “King Arthur Baking” sourdough starter kit, which includes their classic starter plus a comprehensive guide. King Arthur’s reputation for quality ingredients and thorough testing makes this a trustworthy choice.
For those seeking a premium experience, artisan bakery kits often include heirloom starter cultures with unique flavor profiles. These cultures sometimes trace their lineage back over a century, carrying distinctive regional characteristics.
Budget-friendly options exist too. Some kits focus solely on the dehydrated starter and instructions, allowing bakers to source their own jars and tools. This approach reduces cost while still providing the crucial living culture.
DIY vs. Pre-Made Starter Kits
The decision between creating a starter from scratch or purchasing a kit depends on several factors. Making a starter at home costs almost nothing just flour and water. It also provides a sense of accomplishment and deeper connection to the baking process.
However, pre-made kits offer convenience and reliability. The dehydrated cultures reactivate quickly, usually within two to three days instead of seven. This appeals to bakers eager to start baking immediately.
Geographic location can influence this decision. Areas with naturally occurring wild yeast populations (near bakeries, breweries, or grain fields) tend to develop vigorous starters quickly. More sterile urban environments might benefit from a proven culture.
Quality control represents another consideration. Established starter cultures from reputable sources ensure consistent results, while homemade starters can vary depending on environmental factors. Neither approach is inherently better it’s about personal preference and circumstances.
Where to Buy Sourdough Starter

Finding quality sourdough starter has become easier as demand has grown. Multiple purchasing options exist, each with distinct advantages.
Online Retailers for Sourdough Starter
E-commerce platforms stock numerous starter options. Amazon carries various brands of dehydrated starter, with customer reviews providing valuable insights into quality and reliability. Breadtopia and Cultures for Health specialize in sourdough supplies, offering premium cultures and extensive educational resources.
Etsy has emerged as an unexpected source for artisan starters. Small-scale bakers sell portions of their established cultures, often with interesting backstories and regional characteristics. These unique starters can add character to homemade bread.
King Arthur Baking Company’s website offers their classic starter along with detailed reactivation instructions. Their customer service team provides troubleshooting support, making this a beginner-friendly option.
When ordering online, check shipping times and methods. Dehydrated starters remain stable during shipping, but some sellers offer fresh starter that requires faster delivery. Reading product descriptions carefully prevents disappointment.
Local Bakeries and Specialty Stores
Many artisan bakeries gladly share or sell portions of their starter to enthusiastic home bakers. Building a relationship with local bakers can lead to valuable mentorship and advice. Some bakeries even host sourdough workshops where participants leave with active starter.
Specialty kitchen stores increasingly stock sourdough supplies, including starter cultures and equipment. The staff at these shops often possess baking knowledge and can recommend products based on skill level.
Health food stores sometimes carry refrigerated or frozen starter in their baking sections. While less common, this option provides immediate access without waiting for dehydrated cultures to reactivate.
Farmers’ markets occasionally feature bakers selling homemade bread alongside starter portions. These community-focused environments foster connections with experienced bakers willing to share tips and techniques.
Buying vs. Making Your Own Starter
Both paths have merit, and the choice ultimately reflects personal priorities. Creating a starter from scratch offers deeper understanding of the fermentation process and costs virtually nothing. The week-long journey of nurturing wild yeast feels rewarding and educational.
Purchasing starter provides speed and assurance. Established cultures from reputable sources bring proven performance and often unique flavor characteristics. For busy individuals or those lacking confidence, this route reduces initial friction.
Some bakers compromise by starting with a purchased culture but then maintaining and experimenting with it long-term. This combines the reliability of proven yeast strains with the hands-on experience of starter care.
Consider trying both approaches. Many experienced bakers maintain multiple starters a reliable purchased culture for consistent results and experimental homemade versions for exploring different flavors. The sourdough community encourages this kind of creative exploration.
Troubleshooting and Maintenance
Even experienced bakers encounter challenges with sourdough starters. Understanding common issues and their solutions ensures long-term success.
Common Sourdough Starter Problems
Lack of activity ranks as the most frequent complaint. If a starter isn’t bubbling or rising after a week, several factors might be responsible. Low temperatures slow yeast activity dramatically placing the jar in a warmer spot often solves the problem. Chlorinated water can inhibit growth; switching to filtered water helps.
Excessive liquid (“hooch”) forming on top indicates hunger. This alcohol byproduct appears when the starter has consumed all available food. More frequent feedings or larger flour portions address this issue. The dark liquid can be stirred back in or poured off depending on desired flavor intensity.
Mold growth demands immediate action. Unlike harmless hooch, mold appears as fuzzy patches in colors like pink, orange, or green. A moldy starter should be discarded entirely and started fresh. Mold usually results from contamination ensure jars and utensils are clean, and avoid introducing unwashed hands.
Weird smells beyond the typical tangy aroma signal problems. Acetone or nail polish remover scents mean the starter is extremely hungry. Feed it twice daily until the smell normalizes. Truly foul odors resembling garbage suggest contamination; when in doubt, start over.
Inconsistent performance frustrates many bakers. A starter that works beautifully one week and sluggishly the next often suffers from irregular feeding schedules or temperature fluctuations. Establishing a consistent routine and stable environment improves reliability.
For savory applications, consider using excess starter in recipes like sourdough gravy or sourdough chicken and dumplings soup.
How to Revive a Neglected Starter
Life gets busy, and starters sometimes suffer neglect. Fortunately, these resilient cultures can often bounce back with proper care. A starter left unfed in the refrigerator for months may look lifeless, but don’t give up immediately.
Begin by examining it carefully. Discard any mold this cannot be saved. If only hooch is present, pour off the dark liquid and scoop out the top layer, discarding any discolored portions. Keep the healthiest-looking center portion.
Feed this rescued portion with fresh flour and water using a 1:2:2 ratio (1 part starter to 2 parts flour and 2 parts water). This dilutes any accumulated acids while providing abundant food. Let it sit at room temperature.
Repeat this feeding process twice daily for several days. The starter should gradually show signs of life first small bubbles, then increasing activity. Patience is essential; revival can take three to seven days.
Once consistent bubbling resumes and the starter doubles reliably, it’s ready for regular maintenance again. Some bakers notice revived starters perform even better than before, perhaps due to the survival of the hardiest yeast strains.
Long-Term Storage Tips
Maintaining a starter doesn’t require daily commitment. Several storage methods accommodate different lifestyles and baking frequencies.
Refrigerator storage suits most home bakers. After feeding, let the starter sit at room temperature for 30-60 minutes, then refrigerate. This slows fermentation dramatically, requiring feeding only once weekly. Before baking, remove from the fridge, feed, and let it warm to room temperature until bubbly and active.
Freezing works for extended breaks from baking. Feed the starter, let it become active, then transfer portions to freezer-safe containers or ice cube trays. Frozen starter keeps for several months. Thaw in the refrigerator overnight, then resume regular feeding to reactivate.
Drying creates a backup that lasts indefinitely. Spread a thin layer of active starter on parchment paper and let it air dry completely this takes 1-2 days. Break the dried sheet into flakes and store in an airtight container. To reactivate, mix the flakes with equal parts flour and water, then resume normal feeding.
Continuous feeding works for frequent bakers. Keep the starter at room temperature and feed it twice daily. This maintains peak activity but requires more attention and flour. Professional bakeries typically use this method.
Many bakers maintain their starter in the refrigerator while also keeping a small dried backup. This provides security if something goes wrong with the active culture, the dried version can rebuild it.
Real-World Applications and Advanced Techniques
Beyond basic bread baking, sourdough starters enable countless culinary adventures. Advanced techniques expand possibilities and minimize waste.
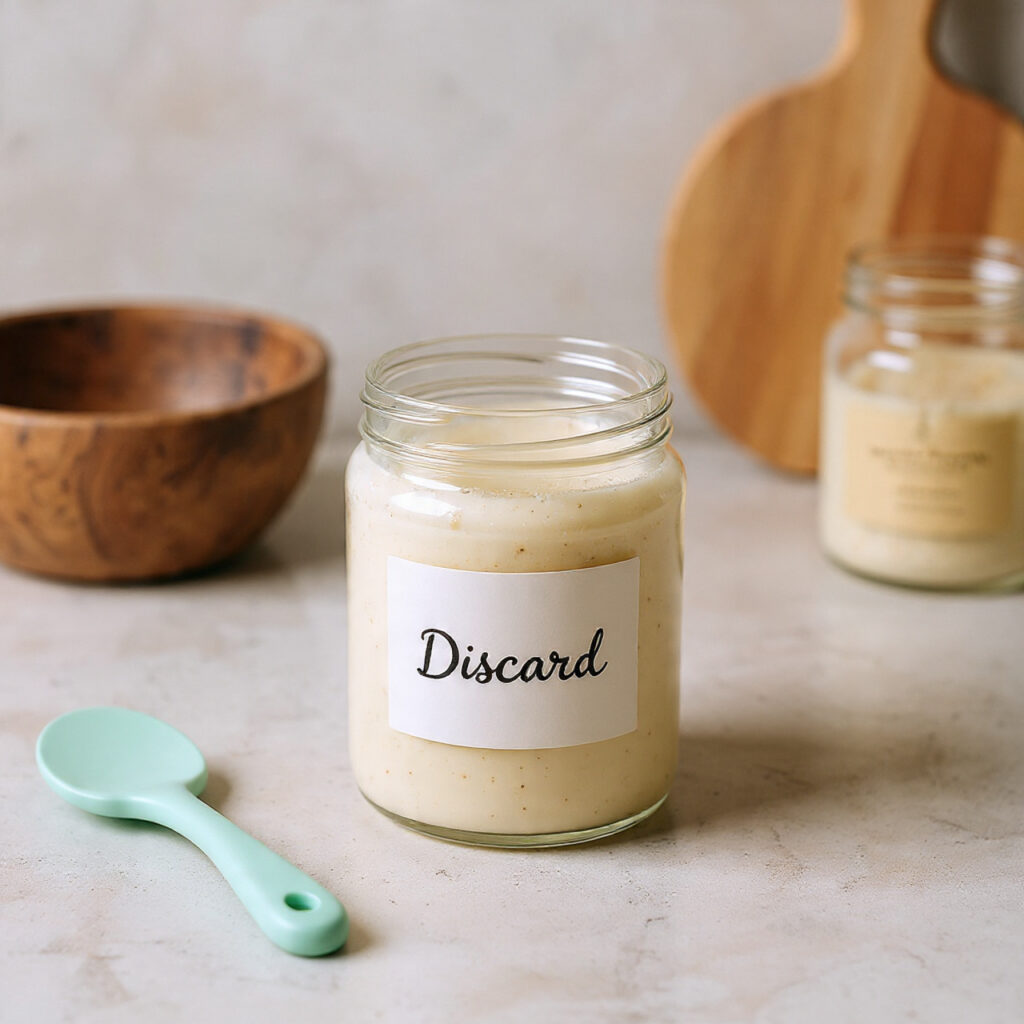
Using Sourdough Discard in Recipes
The discard removed during feeding doesn’t have to go to waste. This unfed starter (which hasn’t doubled yet) works beautifully in numerous recipes, adding subtle tang and interesting texture.
Sourdough discard pancakes and waffles have become breakfast staples in many households. The starter adds fluffiness and complex flavor while reducing food waste. Simply substitute discard for some of the liquid in standard recipes.
Crackers represent another excellent use for discard. Mix it with olive oil, salt, and herbs, roll thin, and bake until crispy. These crackers rival store-bought versions in flavor and texture.
Sweet applications work surprisingly well too. Sourdough mini chocolate chip muffins demonstrate how discard enhances baked goods beyond bread. The slight tang balances sweetness while creating tender crumbs.
Pizza dough benefits enormously from sourdough discard. The extended fermentation develops flavor complexity that standard yeast dough can’t match. Many pizzerias now advertise sourdough crusts as a premium option.
Storing discard in the refrigerator accumulates enough for weekend baking projects. A sealed container keeps discard fresh for up to a week, providing plenty of material for experimental cooking.
Scaling Your Starter for Different Recipes
Different recipes require varying amounts of active starter. Learning to scale the culture up or down prevents waste and ensures sufficient quantity.
For occasional baking, maintain a small starter (around 50g total) in the refrigerator. When a recipe calls for more, perform several feedings to build up the necessary amount. Feed 20g starter with 40g flour and 40g water, wait until doubled, then repeat. Each cycle roughly triples the quantity.
Frequent bakers often maintain larger quantities 200-300g ready for spontaneous baking. This requires more flour for maintenance but eliminates the need for building up.
The “scrapings method” efficiently maintains a starter while controlling quantity. Keep just a thin layer of starter coating the jar sides, then feed with full portions of flour and water. This minimizes discard while ensuring the culture stays vigorous.
Bakers preparing for big projects sometimes create a “levain” a separate, one-time build of the starter optimized for a specific recipe. This allows customization of hydration levels and fermentation times without affecting the mother starter.
Understanding ratios simplifies scaling. A 1:1:1 ratio (equal parts starter, flour, and water) maintains consistency. Adjusting to 1:2:2 or 1:5:5 changes fermentation speed and flavor development. Experimentation reveals which ratios work best for different breads.
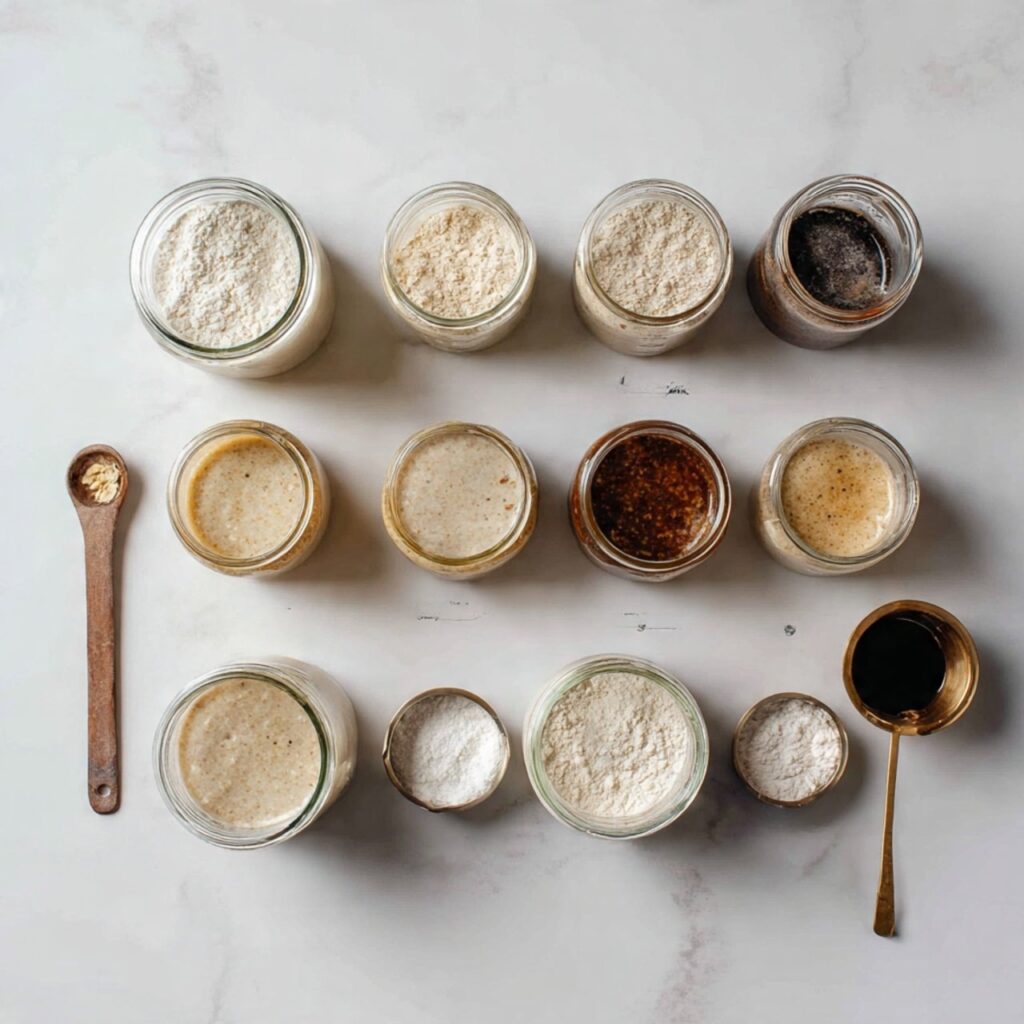
Creating Flavor Variations
The standard all-purpose flour starter serves as an excellent foundation, but exploring different flours opens new flavor dimensions. Each grain contributes unique characteristics.
Rye flour additions (even partial) intensify sourness and create earthier notes. Replacing 25% of the all-purpose flour with rye noticeably impacts flavor without dramatically changing handling properties.
Whole wheat flour contributes nuttiness and sweetness. A 50/50 blend of whole wheat and all-purpose creates a balanced, flavorful culture that works beautifully in hearty breads.
Spelt flour offers ancient grain complexity with a slightly sweet, nutty profile. Spelt starters ferment vigorously and produce delicate, easily digestible breads.
Einkorn flour, another ancient grain, creates buttery, mild starter perfect for delicate pastries and lighter breads. Its lower gluten content requires adjustment in bread recipes but produces wonderful flavor.
Temperature manipulation also affects flavor. Cool fermentation (60-65°F) produces milder, slightly sweet bread, while warm fermentation (75-80°F) intensifies sourness. Some bakers maintain separate warm and cool starters for different bread styles.
Adding inclusions like herbs, garlic, or even hops creates specialized starters for specific breads. A rosemary-infused starter makes exceptional focaccia, while a hop-infused version mimics Belgian beer bread. These experimental cultures should be kept separate from the main starter to avoid contaminating it.
FAQs About Sourdough Starter
How long does it take to make sourdough starter?
Creating an active starter from scratch typically requires five to seven days. This timeline varies based on several factors including ambient temperature, flour type, and local wild yeast populations.
Warmer environments (around 75-80°F) accelerate the process, sometimes producing active starters in as little as four days. Cooler kitchens (65-70°F) might need eight to ten days. Using whole wheat or rye flour instead of all-purpose can shorten the timeline by a day or two due to higher enzyme and nutrient content.
Geographic location influences development speed surprisingly. Bakers living near grain fields, breweries, or established bakeries often report faster starter activation the air carries more wild yeast in these environments. Urban kitchens in sterile high-rises sometimes take longer.
Once established, a dormant starter (dried or frozen) reactivates much faster usually within two to three days of resumed feeding. This makes maintaining a backup dried starter valuable for anyone who travels or takes breaks from baking.
Signs of readiness include consistent doubling within 4-6 hours of feeding, passing the float test, and showing abundant bubbles throughout. Don’t rush this process using an immature starter results in dense, poorly risen bread.
Can I use whole wheat flour for my starter?
Absolutely! Whole wheat flour works excellently for creating and maintaining sourdough starter. In fact, many bakers prefer it for specific reasons.
Whole wheat contains more nutrients than refined white flour, providing abundant food for yeast and bacteria. This often results in more vigorous fermentation and faster starter development. The bran and germ in whole wheat also harbor more wild yeast naturally.
A whole wheat starter produces bread with deeper, nuttier flavor and darker color. The nutritional profile increases too whole grain sourdough offers more fiber, vitamins, and minerals than white flour versions.
However, whole wheat absorbs more water than all-purpose flour. When maintaining a whole wheat starter, increase the water ratio slightly typically 10-15% more. A 1:1:1.15 ratio (starter:flour:water) often works better than strict 1:1:1.
Bakers can also create “hybrid” starters using both whole wheat and all-purpose flour. A 50/50 blend combines the vigor and nutrition of whole wheat with the milder flavor and easier handling of white flour.
Switching an existing all-purpose starter to whole wheat is simple just begin feeding with whole wheat instead. After three or four feedings, the yeast and bacteria will fully adapt to the new flour. The reverse works equally well when transitioning from whole wheat to white.
How do I know if my starter has gone bad?
Distinguishing between normal starter behavior and genuine contamination prevents unnecessary panic. Sourdough starters are remarkably resilient and rarely truly “go bad.”
Visual signs of problems: Mold appears as fuzzy patches in colors other than beige/tan pink, orange, green, or black spots indicate contamination. Unlike hooch (the dark liquid that’s harmless), mold has texture and won’t stir back in smoothly. Any mold presence means the entire starter should be discarded.
Smell indicators: Healthy starters smell pleasantly sour, like yogurt, beer, or vinegar. Sharp or strongly acetone-like smells indicate extreme hunger but not contamination feeding resolves this. Truly rotten odors resembling garbage, decay, or sewage suggest something went wrong. When genuinely unsure, trust your instincts if it smells putrid rather than just sour, start fresh.
Texture changes: Normal starters vary from thick and stretchy to loose and bubbly depending on hydration and activity. Slimy, excessively stringy, or gummy textures that don’t improve with feeding might indicate bacterial imbalance. Pink or orange discoloration (rather than typical beige/gray) signals contamination.
Behavioral clues: A previously active starter that completely stops bubbling despite warm temperatures and regular feeding may have pH imbalance or contamination. However, temporary sluggishness usually stems from temperature changes, water quality, or feeding schedule disruptions.
Recovery attempts: Before discarding, try intensive care remove any questionable top layers, keep only the healthiest center portion, and feed twice daily with a 1:5:5 ratio for several days. Many seemingly dead starters revive with this treatment.
Remember that hooch, separation, and even slight color variations (gray or brown tinges) are normal and harmless. True contamination is relatively rare when proper hygiene is maintained.
Happy baking!
Sourdough Starter Recipe
Ingredients
- 1 cup unbleached all-purpose flour
- ½ cup filtered water
- Extra flour & water for daily feeding
Instructions
Day-by-Day Feeding Schedule
- Day 1: Mix 1/2 cup flour with 1/4 cup water in a clean jar. Stir until no dry flour remains. The consistency should resemble thick pancake batter. Cover loosely with a cloth or lid (don’t seal tightly the culture needs oxygen). Leave at room temperature in a draft-free spot.
- Day 2: The mixture may not show much activity yet. This is completely normal. No feeding required today just check on it and give it a stir.
- Day 3: Small bubbles might start appearing. Discard half the mixture (or about 1/2 cup) and feed with 1/2 cup fresh flour and 1/4 cup water. Stir well and cover loosely again.
- Day 4: More bubbles should be visible, and the mixture may have a slightly sour smell. Repeat the discard and feeding process from Day 3.
- Day 5: The starter should be noticeably more active, with bubbles throughout and possible volume increase. Continue daily discarding and feeding.
- Day 6: Activity should be strong now. The starter might double in size between feedings. Maintain the daily feeding schedule.
- Day 7: The starter should be ready if it consistently doubles within 4-6 hours after feeding and shows plenty of bubbles.
- Consistency is key throughout this process. Feeding at roughly the same time each day helps establish a predictable rhythm. Room temperature affects timing warmer kitchens may see faster development.
Signs Your Starter is Ready to Use
- A mature, active starter displays several telltale characteristics. It should double in volume within 4-6 hours of feeding, creating a domed top with a network of bubbles throughout. The texture becomes light and airy, almost mousse-like.
- The “float test” provides a reliable readiness check. Drop a small spoonful of starter into a glass of water if it floats, it’s ready to bake with. Sinking indicates it needs more time or more frequent feedings.
- A pleasant, tangy aroma similar to yogurt or beer signals healthy fermentation. Overly sharp or acetone-like smells suggest the starter is hungry and needs feeding. The mixture should have a slightly sweet-sour smell that’s appealing, not off-putting.
- Visual cues matter too. A healthy starter shows distinct layers with clear liquid (called “hooch”) occasionally forming on top. This dark liquid is harmless just stir it back in before feeding or pour it off if a milder flavor is preferred.
Notes
- Use filtered water for best results
- Keep starter at 70–75°F
- If inactive, continue feeding daily
Sourdough for Beginners: How to Make the Perfect Loaf
Identify Underproofed Sourdough Bread with Real Examples
20+ Creative Sourdough Discard Recipes: Stop Wasting Your Starter!