How to Make a Sourdough Starter
Are you ready to take the plunge and bake your own sourdough bread? With just two ingredients and a pinch of patience, you can have your own sourdough starter in a week's time that's ready to bake sourdough bread, biscuits, pizza crust, and so many tasty sourdough recipes.
Ingredients
- Organic Rye Flour
- Unbleached All-Purpose Flour
- Filtered Water
Instructions
Day 1:
- On the first day, grab your kitchen scale and weigh out your clean jar of choice. First things first, it is important to note how much your jar weighs before adding your first ingredients as it will be helpful information throughout the sourdough starter-making process. You can write this information on my Free Printable - How to Make a Sourdough Starter, as you track your sourdough starter-making journey!
- Next, add 60g (1/2 cup) of organic rye flour or whole wheat flour and 60g (1/4 cup) of room-temperature, filtered water to your jar.
- Stir until all of the flour and water has been incorporated. Be sure to scrape all of the sides so that no flour is left behind. The consistency should be thick, like pancake batter, almost pasty.
- Cover with a towel, plastic wrap, or a loose canning lid. You want to make sure that you cover the sourdough starter to prevent extra bacteria or insects from getting into your starter, but you also want to cover it loosely to allow CO2 to escape.
- Leave your starter in a warm spot for 24hrs.
Day 2:
- The next day, scan your sourdough starter for signs of fermentation. You might notice small bubbles on top and throughout your homemade sourdough starter. That is a sign that the fermentation process has begun! If you do not see any bubbles, that is okay. The tiny bubbles may have come and gone while you were sleeping.
- Keep your sourdough starter covered and in a warm place for another 24 hours.
Day 3:
- Today will be the first time you will feed your sourdough starter. To do so, you will need your kitchen scale, organic all-purpose flour or white bread flour, and room-temperature, filtered water. Weigh your sourdough starter and discard half of the new starter (about 60g).
- Believe me, I'm not too fond of waste, but this is necessary in order to cultivate a healthy starter. In a few days, you will be able to use and save that discard for yummy recipes like sourdough pancakes or banana bars. But for now, discard half of the starter. Trust the process.
- Mix equal parts water and flour (60g of each) into your jar and mix thoroughly with your remaining starter. Again, the texture will be thick and pasty, a little bit like peanut butter. Add more water if necessary.
- Cover loosely and leave in a warm spot for another 24 hours.
Days 4-6:
- For the next couple of days, repeat the exact same process described for Day 3. You will start to notice more activity from your sourdough starter. Place a rubber band on the outside of the jar to track how much it grows each day.
- Feed the starter again when you noticed it has fallen back to its mixing height. Depending on the temperature of your environment and the ingredients used, this could mean 1-2 feedings a day.
- Something you might notice during the next few days is a dark and pungent-smelling liquid on top of your sourdough starter. Don't be alarmed, your starter is not ruined. This is known as hooch and it is a sign that your starter is hungry.
- If you have brown liquid, or hooch, on top, you have two options. You can either remove the dark liquid or stir it in your starter. Some prefer stirring in the hooch to add a more sour flavor to their dough. I go back and forth. You choose!
Day 7:
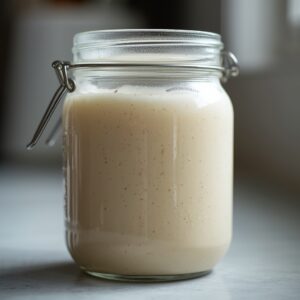
- Now you should begin to notice that your starter is rising at least double its size with plenty of bubbles on top and throughout. The texture should look light and puffy, but not runny. A bubbly and active sourdough stater's aroma should be pleasantly sweet and yeast-smelling, not sour or like gym socks.
- When all of these clues are present, you are ready to bake bread!
- If not, don't worry. It is quite common for some starters to need more time to develop a strong culture of bacteria. Continue to discard and feed your starter for another few days up to two weeks. Whatever you do, don't give up.
Notes
- Here are some go-to signs of what an active starter will look like:
- The starter has doubled in size (I track this growth by putting a rubber band on the outside of my jar)
- You can see plenty of bubbles on top and all throughout the starter. Some may be small or large, either is great a sign!
- Your starter has a pleasant yeasty smell to it, not super sour or pungent.
- If all of these are present, then your starter should be all set to bake homemade bread!
- If you are still a bit unsure, one test that I have used in the past is the float test. To do so, fill a drinking glass with lukewarm water and drop a spoonful of your sourdough starter in the cup. If your starter floats, it is ready to use! If it sinks to the bottom of the cup, then allow your starter more time to ferment.
- How to Feed and Maintain Your Sourdough Starter:
- You made it through the entire process of developing your own bubbly starter, but you're wondering, "Now what?"
- Maintaining your sourdough starter to survive and thrive for years to come is quite simple. There are two main practices.
Refrigerator:
- If you are someone who might want to try a new bread recipe once a week, I suggest you place your starter in the refrigerator. Being in a chilled environment will slow down the feeding process of the starter, so you will only need to feed it once every week or every two weeks.
- For example, if I want to make a loaf of bread on Thursday evening, I will pull my sourdough starter out of the fridge that morning and feed it. Throughout the day it will warm to room temperature and become bubbly and active again just in time for me to make my bread dough that evening.
- Once I've used the needed amount of starter, I will discard until I have 30 grams of starter (save the discard for yummy discard recipes below!) and feed it the same amount of flour and water. Mix it all up and put it back in the fridge.
Countertop:
- Now if you plan on making sourdough treats more often, keeping your sourdough starter on the kitchen counter may be a good option for you.
- Since the starter will be kept at room temperature, it will feed on the flour much faster than the sourdough starter in the fridge. Therefore, you will need to feed your starter more frequently - typically every 12-24 hours. Keep it covered loosely and in a location with ambient temperature.